
Of Ogres, Giants, Half-Demons and Hobbies
We have a bumper blog post for you all today, fellow Miercenaries; not only do I speak of new hobby stuff you can grab from us, there's some amazing images of ogres, giants and demilegionarii!
Rob Lane | June 23, 2026

Swine of Broḡa
We've got a fantastic battle host for you this beautiful June, Miercenaries - the Swine of Broḡa, charging into battle with boar spear and razor mane and a lot of attitude!
Rob Lane | June 04, 2026

Goodies, Baddies and Uglies
It's far too hot for my northern comfort, but despite the heat I've lots of lovely work in progress images to show you today, along with an update on how things are going with battle hosts and backlogs and so forth...
Rob Lane | May 25, 2026

Brunchaath's Herd
Apologies for the delay in getting this host sorted for May, but it's here... finally! Enter the gabrax, twenty of them, a darkstone and captive pin up and six giant gabrox to head-butt your enemies into submission!
Rob Lane | May 13, 2026

The Weeks Ahead
It's about time I posted an update again, so here I am talking about next week, the week after that, and probably the week after that too. And then further on. Because there's quite a lot going on at Mierce Towers...
Rob Lane | May 08, 2026

Backlogs and Backwhales
It's time for an update on all things Mierce, Miercenaries! Today I'll be talking about backlogs, backwhales, beastmen, and brute-beasts...
Rob Lane | April 13, 2026

Killers of Carn Bran
We've got a superb battle host for you this April... the Killers of Carn Bran, for the Ysian kindred of Darklands. You've got fourteen superb drunes and twelve incredible brutes to bash up your enemies with!
Rob Lane | April 09, 2026

Don't Forget to Remember
Life moves so fast, you forget what you've done over the years. In retiring a number of our older miniatures, and selling the studio painted versions of them, we've had to trawl through boxes and boxes of miniatures of yore: and by gum, we've created some incredible miniatures!
Rob Lane | March 24, 2026

Retired
In an unusual bout of brevity, this week I speak only of retiring miniatures, studio paintjobs and Ysians...
Rob Lane | March 16, 2026

Man-Manglers
This month's amazing digital battle host gives you a veritable horde of giant mole-rat-men to terrify your enemies with!
Rob Lane | March 09, 2026
The finest dark fantasy miniatures on middle-earth
Latest Releases 1156 products
-

STUDIO PAINTED Brutan, Mound Beetle [auction]
JUT-CNT-8173-PTD JUT-CNT-8173-PTD -

STUDIO PAINTED Bholg of Chliara, Fir Bholg Thrower Unit [auction]
ERN-CNT-3920-003-PTD ERN-CNT-3920-003-PTDSTUDIO PAINTED Bholg of Chliara, Fir Bholg Thrower Unit [auction]
ERN-CNT-3920-003-PTD ERN-CNT-3920-003-PTDin stock -
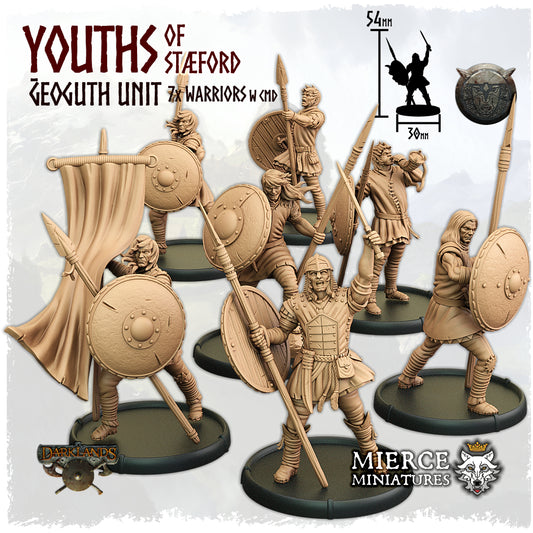
![Youths of Stæford, Ḡeoguth Unit [digital]](//mierce-miniatures.com/cdn/shop/files/ANG-MRC-2150-007-YouthsofStaeford-M-M-P-01.jpg?v=1780504611&width=533)

Youths of Stæford, Ḡeoguth Unit [digital]
ANG-MRC-2150-007 ANG-MRC-2150-007Youths of Stæford, Ḡeoguth Unit [digital]
ANG-MRC-2150-007 ANG-MRC-2150-007Regular price £15.99Regular priceUnit price / per£15.99Sale price £15.99in stock -
![Youths of Stæford, Ḡeoguth Unit [digital]](//mierce-miniatures.com/cdn/shop/files/ANG-DRA-2150-007-YouthsofStaeford-M-M-P-01.jpg?v=1780504558&width=533)
Youths of Stæford, Ḡeoguth Unit [digital]
ANG-BRN-2150-007 ANG-BRN-2150-007Youths of Stæford, Ḡeoguth Unit [digital]
ANG-BRN-2150-007 ANG-BRN-2150-007Regular price £15.99Regular priceUnit price / per£15.99Sale price £15.99in stock -
![Youths of Stæford, Ḡeoguth Unit [digital]](//mierce-miniatures.com/cdn/shop/files/ANG-BRN-2150-007-YouthsofStaeford-M-M-P-01.jpg?v=1780504551&width=533)
Youths of Stæford, Ḡeoguth Unit [digital]
ANG-BRN-2150-007 ANG-BRN-2150-007Youths of Stæford, Ḡeoguth Unit [digital]
ANG-BRN-2150-007 ANG-BRN-2150-007Regular price £15.99Regular priceUnit price / per£15.99Sale price £15.99in stock -
![Snorters of Ḡerne, Frēofor Unit [digital]](//mierce-miniatures.com/cdn/shop/files/mierce-anglecynn-eofora-snorters-of-gerne-freofor-unit_01_large_9da4122c-89cf-4707-a2a9-38302d407b98.png?v=1780491737&width=533)
Snorters of Ḡerne, Frēofor Unit [digital]
ANG-EFR-7060-005 ANG-EFR-7060-005Snorters of Ḡerne, Frēofor Unit [digital]
ANG-EFR-7060-005 ANG-EFR-7060-005Regular price £21.99Regular priceUnit price / per£21.99Sale price £21.99in stock -
![Grunters of Rendlæs, Wereofor Unit [digital]](//mierce-miniatures.com/cdn/shop/files/mierce-anglecynn-eofora-grunters-of-rendlaes-wereofor-unit-7x-warriors-w-cmd_01_large_ba229077-5f95-4a95-84a8-d39d837403b1.png?v=1780491732&width=533)
Grunters of Rendlæs, Wereofor Unit [digital]
ANG-EFR-3710-007 ANG-EFR-3710-007Grunters of Rendlæs, Wereofor Unit [digital]
ANG-EFR-3710-007 ANG-EFR-3710-007Regular price £27.99Regular priceUnit price / per£27.99Sale price £27.99in stock -
![Youths of Stæford, Ḡeoguth Unit [digital]](//mierce-miniatures.com/cdn/shop/files/ANG-EFR-2150-007-YouthsofStaeford-M-M-P-01.jpg?v=1780504541&width=533)
Youths of Stæford, Ḡeoguth Unit [digital]
ANG-EFR-2150-007 ANG-EFR-2150-007Youths of Stæford, Ḡeoguth Unit [digital]
ANG-EFR-2150-007 ANG-EFR-2150-007Regular price £15.99Regular priceUnit price / per£15.99Sale price £15.99in stock -
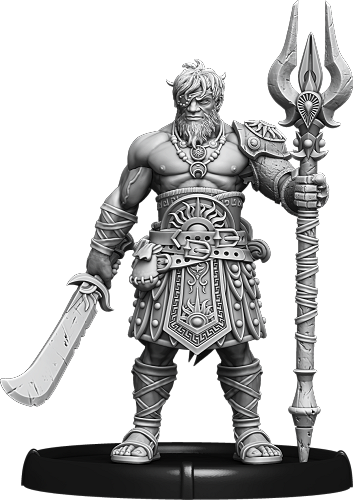
![Broḡa, Wereofor Theḡn [digital]](//mierce-miniatures.com/cdn/shop/files/mierce-anglecynn-eofora-broga-wereofor-thegn_01_large_c5b0dc40-9362-4f0b-b0b1-c9904272fccb.png?v=1780491718&width=533)

Broḡa, Wereofor Theḡn [digital]
ANG-EFR-1601 ANG-EFR-1601Broḡa, Wereofor Theḡn [digital]
ANG-EFR-1601 ANG-EFR-1601Regular price £19.99Regular priceUnit price / per£19.99Sale price £19.99in stock -


Great Cleaver Brunchaath the Vile, Gabrax Dain [digital]
FMR-CHD-1301-100 FMR-CHD-1301-100Great Cleaver Brunchaath the Vile, Gabrax Dain [digital]
FMR-CHD-1301-100 FMR-CHD-1301-100FMR-CHD-1301-100 Fomoraic - Cursed HerdRegular price £3.99Regular priceUnit price / per£3.99Sale price £3.99in stock -


Great Cleaver Brunchaath the Vile, Gabrax Dain
FMR-CHD-1301-100 FMR-CHD-1301-100Great Cleaver Brunchaath the Vile, Gabrax Dain
FMR-CHD-1301-100 FMR-CHD-1301-100FMR-CHD-1301-100 Fomoraic - Cursed HerdRegular price £6.99Regular priceUnit price / per£6.99Sale price £6.99made to order -

Baabath's Herd, Herdax Slan-Gabrax Unit [digital]
FMR-CHD-2770-005 FMR-CHD-2770-005Baabath's Herd, Herdax Slan-Gabrax Unit [digital]
FMR-CHD-2770-005 FMR-CHD-2770-005FMR-CHD-2770-005 Fomoraic - Cursed HerdRegular price £11.99Regular priceUnit price / per£11.99Sale price £11.99in stock -

Baamath's Herd, Herdspear Slan-Gabrax Unit [digital]
FMR-CHD-2760-005 FMR-CHD-2760-005Baamath's Herd, Herdspear Slan-Gabrax Unit [digital]
FMR-CHD-2760-005 FMR-CHD-2760-005FMR-CHD-2760-005 Fomoraic - Cursed HerdRegular price £11.99Regular priceUnit price / per£11.99Sale price £11.99in stock -

Baagath's Herd, Great Cleaver Gabrax Unit [digital]
FMR-CHD-2660-007 FMR-CHD-2660-007Baagath's Herd, Great Cleaver Gabrax Unit [digital]
FMR-CHD-2660-007 FMR-CHD-2660-007FMR-CHD-2660-007 Fomoraic - Cursed HerdRegular price £15.99Regular priceUnit price / per£15.99Sale price £15.99in stock -

Graach's Herd, Gabrox Unit [digital]
FMR-CHD-3210-006 FMR-CHD-3210-006Graach's Herd, Gabrox Unit [digital]
FMR-CHD-3210-006 FMR-CHD-3210-006FMR-CHD-3210-006 Fomoraic - Cursed HerdRegular price £23.49Regular priceUnit price / per£23.49Sale price £23.49in stock -


Herdax Brunchaath the Vile, Gabrax Dain [digital]
FMR-CHD-1304-100 FMR-CHD-1304-100Herdax Brunchaath the Vile, Gabrax Dain [digital]
FMR-CHD-1304-100 FMR-CHD-1304-100FMR-CHD-1304-100 Fomoraic - Cursed HerdRegular price £3.99Regular priceUnit price / per£3.99Sale price £3.99in stock -


Herdspear Brunchaath the Vile, Gabrax Dain [digital]
FMR-CHD-1303-100 FMR-CHD-1303-100Herdspear Brunchaath the Vile, Gabrax Dain [digital]
FMR-CHD-1303-100 FMR-CHD-1303-100FMR-CHD-1303-100 Fomoraic - Cursed HerdRegular price £3.99Regular priceUnit price / per£3.99Sale price £3.99in stock -

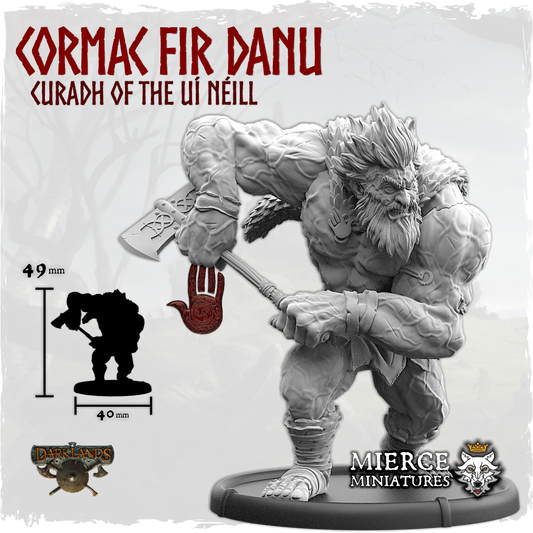
Cormac Fir Danu, Curadh of the Uí Néill
ERN-UNL-1420 ERN-UNL-1420Cormac Fir Danu, Curadh of the Uí Néill
ERN-UNL-1420 ERN-UNL-1420Regular price from £12.49Regular priceUnit price / per£12.49Sale price from £12.49in stock -

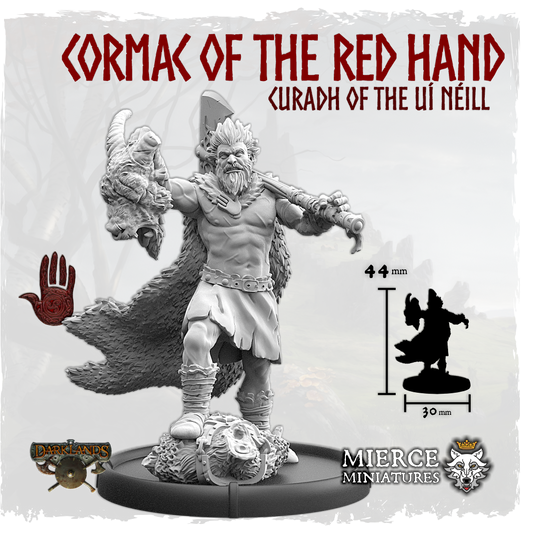
Cormac of the Red Hand, Curadh of the Uí Néill
ERN-UNL-1221 ERN-UNL-1221Cormac of the Red Hand, Curadh of the Uí Néill
ERN-UNL-1221 ERN-UNL-1221Regular price from £7.99Regular priceUnit price / per£7.99Sale price from £7.99in stock -

Brutes of Grigg, Two Club Brute Unit [digital]
YSN-KYS-3820 YSN-KYS-3820Brutes of Grigg, Two Club Brute Unit [digital]
YSN-KYS-3820 YSN-KYS-3820Regular price £27.99Regular priceUnit price / per£27.99Sale price £27.99in stock -

Brutes of Brugg, Great Club Brute Unit [digital]
YSN-KYS-3810 YSN-KYS-3810Brutes of Brugg, Great Club Brute Unit [digital]
YSN-KYS-3810 YSN-KYS-3810Regular price £27.99Regular priceUnit price / per£27.99Sale price £27.99in stock -

Rogues of Carn Bran, Rogue-Drune Unit [digital]
YSN-KYS-2530-005 YSN-KYS-2530-005Rogues of Carn Bran, Rogue-Drune Unit [digital]
YSN-KYS-2530-005 YSN-KYS-2530-005Regular price £11.99Regular priceUnit price / per£11.99Sale price £11.99in stock -

Shadows of Carn Bran, Shadow-Drune Unit [digital]
YSN-KYS-2520-005 YSN-KYS-2520-005Shadows of Carn Bran, Shadow-Drune Unit [digital]
YSN-KYS-2520-005 YSN-KYS-2520-005Regular price £11.99Regular priceUnit price / per£11.99Sale price £11.99in stock -

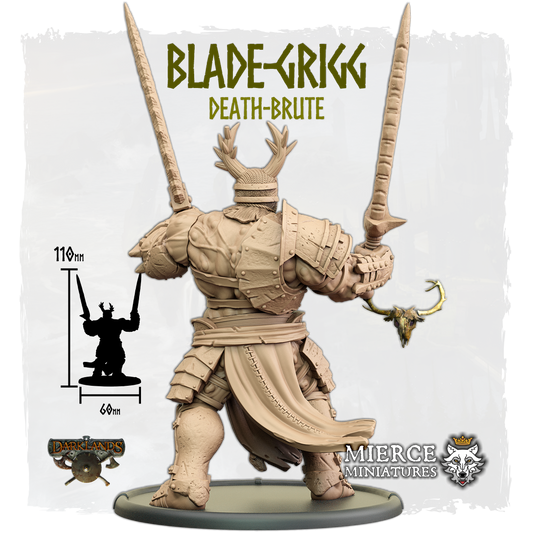
Blade-Grigg, Death-Brute [digital]
YSN-KYS-1607 YSN-KYS-1607Blade-Grigg, Death-Brute [digital]
YSN-KYS-1607 YSN-KYS-1607Regular price £7.99Regular priceUnit price / per£7.99Sale price £7.99in stock -

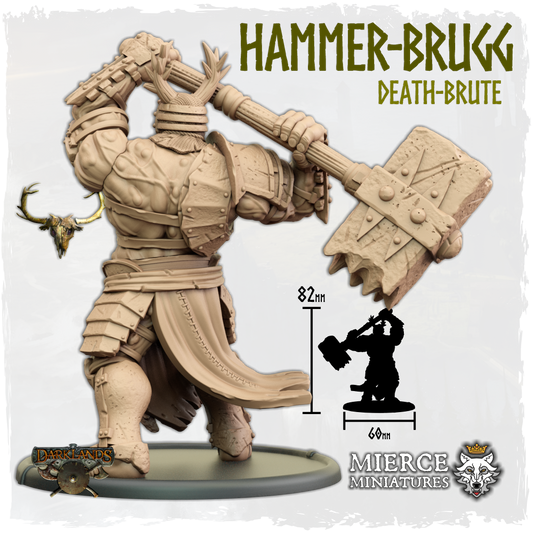
Hammer-Brugg, Death-Brute [digital]
YSN-KYS-1606 YSN-KYS-1606Hammer-Brugg, Death-Brute [digital]
YSN-KYS-1606 YSN-KYS-1606Regular price £7.99Regular priceUnit price / per£7.99Sale price £7.99in stock -

Arwec of Carn Bran, Rogue-Master [digital]
YSN-KYS-1218-100 YSN-KYS-1218-100Arwec of Carn Bran, Rogue-Master [digital]
YSN-KYS-1218-100 YSN-KYS-1218-100Regular price £3.99Regular priceUnit price / per£3.99Sale price £3.99in stock -

Arwec of Carn Bran, Shadow-Master [digital]
YSN-KYS-1217-100 YSN-KYS-1217-100Arwec of Carn Bran, Shadow-Master [digital]
YSN-KYS-1217-100 YSN-KYS-1217-100Regular price £3.99Regular priceUnit price / per£3.99Sale price £3.99in stock -


Slaughterers, Krokodar Unit
KTH-KRO-3710-005 KTH-KRO-3710-005Slaughterers, Krokodar Unit
KTH-KRO-3710-005 KTH-KRO-3710-005Regular price from £24.99Regular priceUnit price / per£24.99Sale price from £24.99made to order -

Gnaw-Jaw's Den, Maul-Rend-Vras Unit [digital]
VRS-TCW-3730 VRS-TCW-3730Gnaw-Jaw's Den, Maul-Rend-Vras Unit [digital]
VRS-TCW-3730 VRS-TCW-3730VRS-TCW-3730 Vras - Three-ClawRegular price £23.99Regular priceUnit price / per£23.99Sale price £23.99made to order -

Gnaw-Claw's Den, Claw-Rend-Vras Unit [digital]
VRS-TCW-3720 VRS-TCW-3720Gnaw-Claw's Den, Claw-Rend-Vras Unit [digital]
VRS-TCW-3720 VRS-TCW-3720VRS-TCW-3720 Vras - Three-ClawRegular price £23.99Regular priceUnit price / per£23.99Sale price £23.99made to order -

Gnaw-Maw's Den, Glaive-Rend-Vras Unit [digital]
VRS-TCW-3710 VRS-TCW-3710Gnaw-Maw's Den, Glaive-Rend-Vras Unit [digital]
VRS-TCW-3710 VRS-TCW-3710VRS-TCW-3710 Vras - Three-ClawRegular price £23.99Regular priceUnit price / per£23.99Sale price £23.99made to order -

Stump-Claw's Burrow, War-Vras Unit [digital]
VRS-TCW-2610-007 VRS-TCW-2610-007Stump-Claw's Burrow, War-Vras Unit [digital]
VRS-TCW-2610-007 VRS-TCW-2610-007VRS-TCW-2610-007 Vras - Three-ClawRegular price £15.99Regular priceUnit price / per£15.99Sale price £15.99in stock -

Glaive Grey-Fur, Vras-Chief [digital]
VRS-TCW-1304-100 VRS-TCW-1304-100Glaive Grey-Fur, Vras-Chief [digital]
VRS-TCW-1304-100 VRS-TCW-1304-100VRS-TCW-1304-100 Vras - Three-ClawRegular price £3.99Regular priceUnit price / per£3.99Sale price £3.99in stock -

Vras Man-Manglers Battle Host [digital]
VRS-TCW-000-H01 VRS-TCW-000-H01Vras Man-Manglers Battle Host [digital]
VRS-TCW-000-H01 VRS-TCW-000-H01VRS-TCW-000-H01 Vras - Three-ClawRegular price £49.99Regular priceUnit price / per£49.99Sale price £49.99made to order -

Jute Depraved of Hyrne Battle Host [digital]
JUT-CNT-000-H01 JUT-CNT-000-H01Jute Depraved of Hyrne Battle Host [digital]
JUT-CNT-000-H01 JUT-CNT-000-H01Regular price £49.99Regular priceUnit price / per£49.99Sale price £49.99in stock -

Fomoraic Marauders of the Eye Battle Host [digital]
FMR-RVE-000-H01 FMR-RVE-000-H01Fomoraic Marauders of the Eye Battle Host [digital]
FMR-RVE-000-H01 FMR-RVE-000-H01FMR-RVE-000-H01 Fomoraic - Reivers of the EyeRegular price £49.99Regular priceUnit price / per£49.99Sale price £49.99in stock -
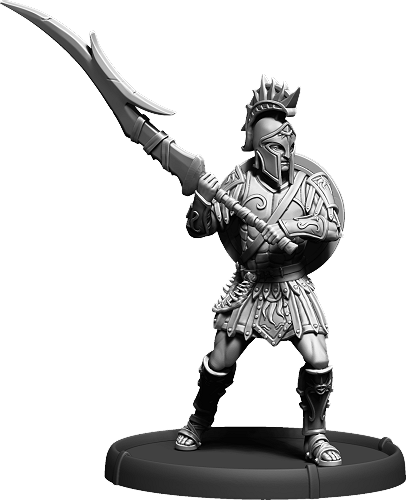
![The Bronzefists Battle Host [digital]](//mierce-miniatures.com/cdn/shop/files/mierce-atalantes-ilios-the-bronzefists-battle-host-digital_01_large_9e71330e-90b7-4a3b-80ab-7b7b134c6437.png?v=1775731777&width=533)
Atalantes The Bronzefists Battle Host [digital]
ATL-ILS-000-H01 ATL-ILS-000-H01Atalantes The Bronzefists Battle Host [digital]
ATL-ILS-000-H01 ATL-ILS-000-H01Regular price £49.99Regular priceUnit price / per£49.99Sale price £49.99in stock -

Albainn Warriors of Alba Battle Host [digital]
ABN-FTU-000-H01 ABN-FTU-000-H01Albainn Warriors of Alba Battle Host [digital]
ABN-FTU-000-H01 ABN-FTU-000-H01Regular price £49.99Regular priceUnit price / per£49.99Sale price £49.99in stock -

Screechers of Cisel, Nihtbat Unit [digital]
JUT-CNT-8145-003 JUT-CNT-8145-003Screechers of Cisel, Nihtbat Unit [digital]
JUT-CNT-8145-003 JUT-CNT-8145-003Regular price £19.99Regular priceUnit price / per£19.99Sale price £19.99in stock -

The Wicked of Mālæsc, Gryreghūl Unit [digital]
JUT-CNT-2920-005 JUT-CNT-2920-005The Wicked of Mālæsc, Gryreghūl Unit [digital]
JUT-CNT-2920-005 JUT-CNT-2920-005Regular price £15.99Regular priceUnit price / per£15.99Sale price £15.99in stock -

Degenerates of Ācholt, Ghūl Unit [digital]
JUT-CNT-2670-005 JUT-CNT-2670-005Degenerates of Ācholt, Ghūl Unit [digital]
JUT-CNT-2670-005 JUT-CNT-2670-005Regular price £11.99Regular priceUnit price / per£11.99Sale price £11.99in stock -

Depraved of Hyrne, Ghūlgār Unit [digital]
JUT-CNT-2650-005 JUT-CNT-2650-005Depraved of Hyrne, Ghūlgār Unit [digital]
JUT-CNT-2650-005 JUT-CNT-2650-005Regular price £11.99Regular priceUnit price / per£11.99Sale price £11.99in stock -


Tētwic, Ghūlhag [digital]
JUT-CNT-1360-100 JUT-CNT-1360-100Tētwic, Ghūlhag [digital]
JUT-CNT-1360-100 JUT-CNT-1360-100Regular price £3.99Regular priceUnit price / per£3.99Sale price £3.99in stock -

Cweld, Ghūl Thain [digital]
JUT-CNT-1302-100 JUT-CNT-1302-100Cweld, Ghūl Thain [digital]
JUT-CNT-1302-100 JUT-CNT-1302-100Regular price £3.99Regular priceUnit price / per£3.99Sale price £3.99in stock -

Cweld, Ghūlgār Thain [digital]
JUT-CNT-1300-100 JUT-CNT-1300-100Cweld, Ghūlgār Thain [digital]
JUT-CNT-1300-100 JUT-CNT-1300-100Regular price £3.99Regular priceUnit price / per£3.99Sale price £3.99in stock -

Taranau, Ieuan Longshore's Mastiff
BRY-SSD-7040-100 BRY-SSD-7040-100Taranau, Ieuan Longshore's Mastiff
BRY-SSD-7040-100 BRY-SSD-7040-100BRY-SSD-7040-100 Brythoniaid - Sell-SwordsRegular price £7.99Regular priceUnit price / per£7.99Sale price £7.99in stock -

Buanec, Alix's Swift-Margh
YSN-SSD-7627-100 YSN-SSD-7627-100Buanec, Alix's Swift-Margh
YSN-SSD-7627-100 YSN-SSD-7627-100YSN-SSD-7627-100 Ysians - Sell-SwordsRegular price £12.49Regular priceUnit price / per£12.49Sale price £12.49in stock -

Ariac, Jowan's Margh
YSN-KYS-7627-100 YSN-KYS-7627-100Ariac, Jowan's Margh
YSN-KYS-7627-100 YSN-KYS-7627-100Regular price £12.49Regular priceUnit price / per£12.49Sale price £12.49in stock -

Skagan, Annik's Margh
YSN-KYS-7621-100 YSN-KYS-7621-100Skagan, Annik's Margh
YSN-KYS-7621-100 YSN-KYS-7621-100Regular price £12.49Regular priceUnit price / per£12.49Sale price £12.49in stock -

Serroc, Kerazek's Karnun-Beast
YSN-KYS-7526-100 YSN-KYS-7526-100Serroc, Kerazek's Karnun-Beast
YSN-KYS-7526-100 YSN-KYS-7526-100Regular price £14.99Regular priceUnit price / per£14.99Sale price £14.99in stock -

Kurunan, Kerazek's Margh
YSN-KYS-7426-100 YSN-KYS-7426-100Kurunan, Kerazek's Margh
YSN-KYS-7426-100 YSN-KYS-7426-100Regular price £12.49Regular priceUnit price / per£12.49Sale price £12.49in stock -

Ecca, Crom's Margh
YSN-KYS-7470-100 YSN-KYS-7470-100Ecca, Crom's Margh
YSN-KYS-7470-100 YSN-KYS-7470-100Regular price £12.49Regular priceUnit price / per£12.49Sale price £12.49in stock -

Margedig, Carrowek's Drune-Margh
YSN-KYS-7510-100 YSN-KYS-7510-100Margedig, Carrowek's Drune-Margh
YSN-KYS-7510-100 YSN-KYS-7510-100Regular price £24.99Regular priceUnit price / per£24.99Sale price £24.99in stock -

Hjarta, Birna's Horse
NOR-SFG-7561-100 NOR-SFG-7561-100Hjarta, Birna's Horse
NOR-SFG-7561-100 NOR-SFG-7561-100Regular price £9.99Regular priceUnit price / per£9.99Sale price £9.99in stock -

Rántoppr, Knútr's Horse
NOR-SFG-7470-100 NOR-SFG-7470-100Rántoppr, Knútr's Horse
NOR-SFG-7470-100 NOR-SFG-7470-100Regular price £12.49Regular priceUnit price / per£12.49Sale price £12.49in stock -

Ealdheorte, Cynuise's Wiht Horsa
JUT-WHT-7630-100 JUT-WHT-7630-100Ealdheorte, Cynuise's Wiht Horsa
JUT-WHT-7630-100 JUT-WHT-7630-100Regular price £12.49Regular priceUnit price / per£12.49Sale price £12.49in stock -

Blæcbreost, Wihtwald's Wiht Horsa
JUT-WHT-7620-100 JUT-WHT-7620-100Blæcbreost, Wihtwald's Wiht Horsa
JUT-WHT-7620-100 JUT-WHT-7620-100Regular price £12.49Regular priceUnit price / per£12.49Sale price £12.49in stock -

Fæle, Ætulla's Horsling
JUT-CNT-7786-100 JUT-CNT-7786-100Fæle, Ætulla's Horsling
JUT-CNT-7786-100 JUT-CNT-7786-100Regular price £7.49Regular priceUnit price / per£7.49Sale price £7.49in stock -

Brol, Grīma's Horsling
JUT-CNT-7246-100 JUT-CNT-7246-100Brol, Grīma's Horsling
JUT-CNT-7246-100 JUT-CNT-7246-100Regular price £7.49Regular priceUnit price / per£7.49Sale price £7.49in stock -

Rīcen, Eormanræd's Warhorse
JUT-CNT-7860-100 JUT-CNT-7860-100Rīcen, Eormanræd's Warhorse
JUT-CNT-7860-100 JUT-CNT-7860-100Regular price £9.99Regular priceUnit price / per£9.99Sale price £9.99in stock -

Taai-ac, Ferocious Cúgacx
FMR-THL-7550 FMR-THL-7550Taai-ac, Ferocious Cúgacx
FMR-THL-7550 FMR-THL-7550Regular price £29.99Regular priceUnit price / per£29.99Sale price £29.99made to order -

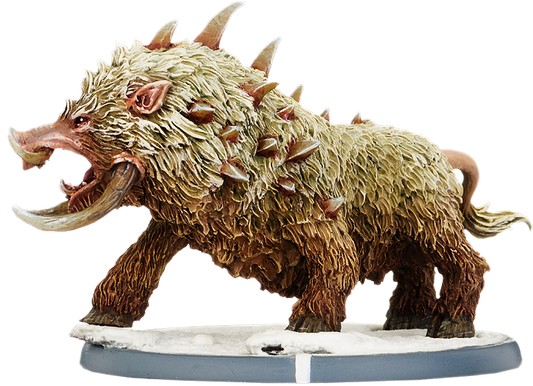
Taachka's Sounder, Toracx Unit
FMR-CHD-7900 FMR-CHD-7900Taachka's Sounder, Toracx Unit
FMR-CHD-7900 FMR-CHD-7900FMR-CHD-7900 Fomoraic - Cursed HerdRegular price from £19.99Regular priceUnit price / per£19.99Sale price from £19.99in stock -

Chraam, Aastrid's Feleacx
FMR-THL-7831-100 FMR-THL-7831-100Chraam, Aastrid's Feleacx
FMR-THL-7831-100 FMR-THL-7831-100Regular price £9.99Regular priceUnit price / per£9.99Sale price £9.99in stock -

Thaalen, Maari's Horse
FMR-RVE-7627-100 FMR-RVE-7627-100Thaalen, Maari's Horse
FMR-RVE-7627-100 FMR-RVE-7627-100FMR-RVE-7627-100 Fomoraic - Reivers of the EyeRegular price £7.99Regular priceUnit price / per£7.99Sale price £7.99made to order -

Graakkan, Kaarstan's Horse
FMR-RVE-7620-100 FMR-RVE-7620-100Graakkan, Kaarstan's Horse
FMR-RVE-7620-100 FMR-RVE-7620-100FMR-RVE-7620-100 Fomoraic - Reivers of the EyeRegular price £9.99Regular priceUnit price / per£9.99Sale price £9.99made to order -

Chantaak, Chaagmuth's Toracx
FMR-CHD-7590-100 FMR-CHD-7590-100Chantaak, Chaagmuth's Toracx
FMR-CHD-7590-100 FMR-CHD-7590-100FMR-CHD-7590-100 Fomoraic - Cursed HerdRegular price £29.99Regular priceUnit price / per£29.99Sale price £29.99in stock -

Laak, Brunchaath's Gooracx
FMR-CHD-7910-100 FMR-CHD-7910-100Laak, Brunchaath's Gooracx
FMR-CHD-7910-100 FMR-CHD-7910-100FMR-CHD-7910-100 Fomoraic - Cursed HerdRegular price £9.99Regular priceUnit price / per£9.99Sale price £9.99in stock -

Kigaat, Mananaan's Horse
FMR-BLR-7750-100 FMR-BLR-7750-100Kigaat, Mananaan's Horse
FMR-BLR-7750-100 FMR-BLR-7750-100Regular price £9.99Regular priceUnit price / per£9.99Sale price £9.99in stock -

Aarwä, Kraan's Ipracx
FMR-BLR-7510-100 FMR-BLR-7510-100Aarwä, Kraan's Ipracx
FMR-BLR-7510-100 FMR-BLR-7510-100Regular price £29.99Regular priceUnit price / per£29.99Sale price £29.99in stock -

Luchtaire, Cormac's Horse
ERN-UNL-7621-100 ERN-UNL-7621-100Luchtaire, Cormac's Horse
ERN-UNL-7621-100 ERN-UNL-7621-100Regular price £12.49Regular priceUnit price / per£12.49Sale price £12.49in stock -

Dílis, Tlachtga's Pony
ERN-UNL-0260-800 ERN-UNL-0260-800Dílis, Tlachtga's Pony
ERN-UNL-0260-800 ERN-UNL-0260-800Regular price £9.99Regular priceUnit price / per£9.99Sale price £9.99in stock -

Sinséir, Rudraige's Horse
ERN-UNL-7760-100 ERN-UNL-7760-100Sinséir, Rudraige's Horse
ERN-UNL-7760-100 ERN-UNL-7760-100Regular price £12.49Regular priceUnit price / per£12.49Sale price £12.49in stock -

Scintilla, Equitus' Horse
BYZ-VAR-7750-100 BYZ-VAR-7750-100Scintilla, Equitus' Horse
BYZ-VAR-7750-100 BYZ-VAR-7750-100BYZ-VAR-7750-100 Byzantii - Legio II VarRegular price £9.99Regular priceUnit price / per£9.99Sale price £9.99in stock -

Calon, Carys' Horse
BRY-GWY-7621-100 BRY-GWY-7621-100Calon, Carys' Horse
BRY-GWY-7621-100 BRY-GWY-7621-100BRY-GWY-7621-100 Brythoniaid - GwyneddRegular price £12.49Regular priceUnit price / per£12.49Sale price £12.49in stock -

Gwynna, Urien's Horse
BRY-GWY-7760-100 BRY-GWY-7760-100Gwynna, Urien's Horse
BRY-GWY-7760-100 BRY-GWY-7760-100BRY-GWY-7760-100 Brythoniaid - GwyneddRegular price £9.99Regular priceUnit price / per£9.99Sale price £9.99in stock -

Labros, Hektor's Skýlokolossos
ATL-ILS-7788-100 ATL-ILS-7788-100Labros, Hektor's Skýlokolossos
ATL-ILS-7788-100 ATL-ILS-7788-100Regular price £12.49Regular priceUnit price / per£12.49Sale price £12.49in stock -

Pegasos, Herakles' Pegakolossos
ATL-ILS-7472-100 ATL-ILS-7472-100Pegasos, Herakles' Pegakolossos
ATL-ILS-7472-100 ATL-ILS-7472-100Regular price £14.99Regular priceUnit price / per£14.99Sale price £14.99in stock -

Medon, Kyros's Hipakolossos
ATL-ILS-7470-100 ATL-ILS-7470-100Medon, Kyros's Hipakolossos
ATL-ILS-7470-100 ATL-ILS-7470-100Regular price £12.49Regular priceUnit price / per£12.49Sale price £12.49in stock -

Hrædan, Timoth's Horse
ANG-MRC-7628-100 ANG-MRC-7628-100Hrædan, Timoth's Horse
ANG-MRC-7628-100 ANG-MRC-7628-100Regular price £12.49Regular priceUnit price / per£12.49Sale price £12.49in stock -

Trēowlic, Cynemon's Horsling
ANG-MRC-7566-100 ANG-MRC-7566-100Trēowlic, Cynemon's Horsling
ANG-MRC-7566-100 ANG-MRC-7566-100Regular price £9.99Regular priceUnit price / per£9.99Sale price £9.99in stock -

Eorling, Wulfhere's Horse
ANG-MRC-7623-100 ANG-MRC-7623-100Eorling, Wulfhere's Horse
ANG-MRC-7623-100 ANG-MRC-7623-100Regular price £12.49Regular priceUnit price / per£12.49Sale price £12.49in stock -

Hildedēor, Berenulf's Horse
ANG-MRC-7622-100 ANG-MRC-7622-100Hildedēor, Berenulf's Horse
ANG-MRC-7622-100 ANG-MRC-7622-100Regular price £12.49Regular priceUnit price / per£12.49Sale price £12.49in stock -

Bealdānum, Eadric's Horse
ANG-MRC-7500-100 ANG-MRC-7500-100Bealdānum, Eadric's Horse
ANG-MRC-7500-100 ANG-MRC-7500-100Regular price £12.49Regular priceUnit price / per£12.49Sale price £12.49in stock -

Fram, Penda's Warhorse
ANG-MRC-7850-100 ANG-MRC-7850-100Fram, Penda's Warhorse
ANG-MRC-7850-100 ANG-MRC-7850-100Regular price £24.99Regular priceUnit price / per£24.99Sale price £24.99in stock -


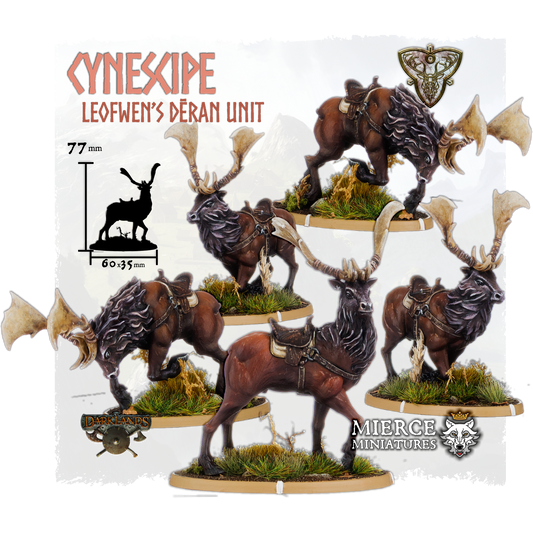
Cynescipe, Leofwen's Dēran Unit
ANG-DRA-7831 ANG-DRA-7831Cynescipe, Leofwen's Dēran Unit
ANG-DRA-7831 ANG-DRA-7831Regular price from £12.49Regular priceUnit price / per£12.49Sale price from £12.49in stock -

Garocc, Skyclad Itaina's Pony
ABN-FTU-7561-190 ABN-FTU-7561-190Garocc, Skyclad Itaina's Pony
ABN-FTU-7561-190 ABN-FTU-7561-190Regular price £9.99Regular priceUnit price / per£9.99Sale price £9.99in stock -

Utocc, Dúngal's Pony
ABN-FTU-7710-100 ABN-FTU-7710-100Utocc, Dúngal's Pony
ABN-FTU-7710-100 ABN-FTU-7710-100Regular price £14.99Regular priceUnit price / per£14.99Sale price £14.99made to order -

Qaano, Srónax Thuln
FMR-THL-1606 FMR-THL-1606Qaano, Srónax Thuln
FMR-THL-1606 FMR-THL-1606Regular price £34.99Regular priceUnit price / per£34.99Sale price £34.99made to order -

Great Cleaver Aadolf, Ograx Reiver Tain
FMR-RVE-1606 FMR-RVE-1606Great Cleaver Aadolf, Ograx Reiver Tain
FMR-RVE-1606 FMR-RVE-1606FMR-RVE-1606 Fomoraic - Reivers of the EyeRegular price £29.99Regular priceUnit price / per£29.99Sale price £29.99made to order -


Beasts of Dirt-Dwell, Rot Beast Unit
BLG-BNB-0064 BLG-BNB-0064Beasts of Dirt-Dwell, Rot Beast Unit
BLG-BNB-0064 BLG-BNB-0064BLG-BNB-0064 BaneLegions - BaneBeastsRegular price from £19.99Regular priceUnit price / per£19.99Sale price from £19.99made to order -

Magma Svrill, Wielder of Khthon
KTH-GOR-1664 KTH-GOR-1664Magma Svrill, Wielder of Khthon
KTH-GOR-1664 KTH-GOR-1664Regular price £24.99Regular priceUnit price / per£24.99Sale price £24.99made to order -

Svrill, Wielder of Khthon
KTH-GOR-1660 KTH-GOR-1660Svrill, Wielder of Khthon
KTH-GOR-1660 KTH-GOR-1660Regular price £24.99Regular priceUnit price / per£24.99Sale price £24.99made to order -

Greathorn Ckaarakk, Tarvax Dain
FMR-CHD-1514 FMR-CHD-1514Greathorn Ckaarakk, Tarvax Dain
FMR-CHD-1514 FMR-CHD-1514FMR-CHD-1514 Fomoraic - Cursed HerdRegular price £29.99Regular priceUnit price / per£29.99Sale price £29.99in stock -

Ckaarakk, Tarvax Dain
FMR-CHD-1511 FMR-CHD-1511Ckaarakk, Tarvax Dain
FMR-CHD-1511 FMR-CHD-1511FMR-CHD-1511 Fomoraic - Cursed HerdRegular price £29.99Regular priceUnit price / per£29.99Sale price £29.99in stock -

Grisly Araigh, Ancient of Síleann Fen
ERN-UNL-1609 ERN-UNL-1609Grisly Araigh, Ancient of Síleann Fen
ERN-UNL-1609 ERN-UNL-1609Regular price £34.99Regular priceUnit price / per£34.99Sale price £34.99made to order -

Araigh, Ancient of Síleann Fen
ERN-UNL-1607 ERN-UNL-1607Araigh, Ancient of Síleann Fen
ERN-UNL-1607 ERN-UNL-1607Regular price £29.99Regular priceUnit price / per£29.99Sale price £29.99made to order -

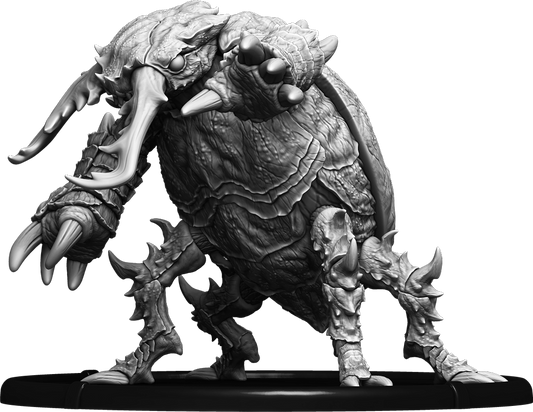
Kholukk, Ogre Drake of the Grimwald with Helmed Head and Hammer
BLG-BNB-0041 BLG-BNB-0041Kholukk, Ogre Drake of the Grimwald with Helmed Head and Hammer
BLG-BNB-0041 BLG-BNB-0041BLG-BNB-0041 BaneLegions - BaneBeastsRegular price £69.99Regular priceUnit price / per£69.99Sale price £69.99made to order -

Lludial, Draiggoch of Yr Wyddfa
BRY-GWY-8815 BRY-GWY-8815Lludial, Draiggoch of Yr Wyddfa
BRY-GWY-8815 BRY-GWY-8815BRY-GWY-8815 Brythoniaid - GwyneddRegular price £299.99Regular priceUnit price / per£299.99Sale price £299.99in stock -

Great Axe Malacant, Servile Champion of Dis
INF-DIS-1101 INF-DIS-1101Great Axe Malacant, Servile Champion of Dis
INF-DIS-1101 INF-DIS-1101Regular price £59.99Regular priceUnit price / per£59.99Sale price £59.99made to order -

Conjunct XIII, Vivicoct
YSN-KYS-8920 YSN-KYS-8920Conjunct XIII, Vivicoct
YSN-KYS-8920 YSN-KYS-8920Regular price £79.99Regular priceUnit price / per£79.99Sale price £79.99available to order -

The Terror of Fortriu, Chimaera
YSN-KYS-8915 YSN-KYS-8915The Terror of Fortriu, Chimaera
YSN-KYS-8915 YSN-KYS-8915Regular price £124.99Regular priceUnit price / per£124.99Sale price £124.99available to order -

Conjunct X, Vivicoct
YSN-KYS-8865 YSN-KYS-8865Conjunct X, Vivicoct
YSN-KYS-8865 YSN-KYS-8865Regular price £79.99Regular priceUnit price / per£79.99Sale price £79.99available to order -

Grazoac, Hedroc's Hound-Margh
YSN-KYS-8680-100 YSN-KYS-8680-100Grazoac, Hedroc's Hound-Margh
YSN-KYS-8680-100 YSN-KYS-8680-100Regular price £44.99Regular priceUnit price / per£44.99Sale price £44.99available to order -

Grazo, Hound-Margh
YSN-KYS-8680 YSN-KYS-8680Grazo, Hound-Margh
YSN-KYS-8680 YSN-KYS-8680Regular price £39.99Regular priceUnit price / per£39.99Sale price £39.99available to order -

Marzaonac, Garth's Chimaera
YSN-KYS-8670-100 YSN-KYS-8670-100Marzaonac, Garth's Chimaera
YSN-KYS-8670-100 YSN-KYS-8670-100Regular price £129.99Regular priceUnit price / per£129.99Sale price £129.99available to order -

Marzaon, Uthard's Chimaera
YSN-KYS-8670 YSN-KYS-8670Marzaon, Uthard's Chimaera
YSN-KYS-8670 YSN-KYS-8670Regular price £124.99Regular priceUnit price / per£124.99Sale price £124.99available to order -

Lazherkazhog, Garth's Mantichora
YSN-KYS-8666-100 YSN-KYS-8666-100Lazherkazhog, Garth's Mantichora
YSN-KYS-8666-100 YSN-KYS-8666-100Regular price £104.99Regular priceUnit price / per£104.99Sale price £104.99available to order -

Lazherkazh, Mantichora
YSN-KYS-8666 YSN-KYS-8666Lazherkazh, Mantichora
YSN-KYS-8666 YSN-KYS-8666Regular price £99.99Regular priceUnit price / per£99.99Sale price £99.99available to order -

Torku, Bone-Aberrant
YSN-KYS-8615 YSN-KYS-8615Torku, Bone-Aberrant
YSN-KYS-8615 YSN-KYS-8615Regular price £59.99Regular priceUnit price / per£59.99Sale price £59.99available to order -

Boloc, Bone-Hulk
YSN-KYS-8602 YSN-KYS-8602Boloc, Bone-Hulk
YSN-KYS-8602 YSN-KYS-8602Regular price £124.99Regular priceUnit price / per£124.99Sale price £124.99available to order -

Hammer-Druc, Meat-Hulk
YSN-KYS-8601 YSN-KYS-8601Hammer-Druc, Meat-Hulk
YSN-KYS-8601 YSN-KYS-8601Regular price £89.99Regular priceUnit price / per£89.99Sale price £89.99available to order -

Banzhorgac, Garth's Pantechora
YSN-KYS-8565-100 YSN-KYS-8565-100Banzhorgac, Garth's Pantechora
YSN-KYS-8565-100 YSN-KYS-8565-100Regular price £99.99Regular priceUnit price / per£99.99Sale price £99.99available to order -

Banzhorg, Pantechora
YSN-KYS-8565 YSN-KYS-8565Banzhorg, Pantechora
YSN-KYS-8565 YSN-KYS-8565Regular price £99.99Regular priceUnit price / per£99.99Sale price £99.99available to order -

Joining XXI, Vivicoct
YSN-KYS-8341 YSN-KYS-8341Joining XXI, Vivicoct
YSN-KYS-8341 YSN-KYS-8341Regular price £32.49Regular priceUnit price / per£32.49Sale price £32.49available to order -

Joining XX, Vivicoct
YSN-KYS-8340 YSN-KYS-8340Joining XX, Vivicoct
YSN-KYS-8340 YSN-KYS-8340Regular price £32.49Regular priceUnit price / per£32.49Sale price £32.49available to order -

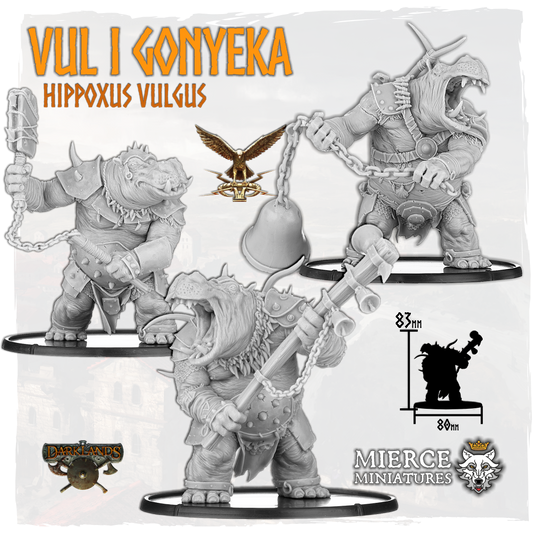
Vul I Gonyeka, Hippoxus Vulgus
BYZ-VAR-8075-003 BYZ-VAR-8075-003Vul I Gonyeka, Hippoxus Vulgus
BYZ-VAR-8075-003 BYZ-VAR-8075-003BYZ-VAR-8075-003 Byzantii - Legio II VarRegular price from £39.99Regular priceUnit price / per£39.99Sale price from £39.99made to order -

Great Axe Damgron, Servile Liege of Dis [digital]
INF-DIS-0206 INF-DIS-0206Great Axe Damgron, Servile Liege of Dis [digital]
INF-DIS-0206 INF-DIS-0206Regular price £24.99Regular priceUnit price / per£24.99Sale price £24.99in stock -

Great Axe Damgron, Servile Liege of Dis
INF-DIS-0206 INF-DIS-0206Great Axe Damgron, Servile Liege of Dis
INF-DIS-0206 INF-DIS-0206Regular price £174.99Regular priceUnit price / per£174.99Sale price £174.99made to order -

Bruus, Great Wiht of Alum Bay
JUT-WHT-8850 JUT-WHT-8850Bruus, Great Wiht of Alum Bay
JUT-WHT-8850 JUT-WHT-8850Regular price £99.99Regular priceUnit price / per£99.99Sale price £99.99made to order -

Twroch ap Roch, Wocor of Pen-y-fan
BRY-POW-8815 BRY-POW-8815Twroch ap Roch, Wocor of Pen-y-fan
BRY-POW-8815 BRY-POW-8815BRY-POW-8815 Brythoniaid - PowysRegular price £149.99Regular priceUnit price / per£149.99Sale price £149.99made to order -

Spears of Dun Durn, Gairlom Unit [digital]
ABN-FTU-2300-005 ABN-FTU-2300-005Spears of Dun Durn, Gairlom Unit [digital]
ABN-FTU-2300-005 ABN-FTU-2300-005Regular price £15.99Regular priceUnit price / per£15.99Sale price £15.99in stock -

Veteran Spears of Dun Durn, Gairmorlom Unit [digital]
ABN-FTU-2100-005 ABN-FTU-2100-005Veteran Spears of Dun Durn, Gairmorlom Unit [digital]
ABN-FTU-2100-005 ABN-FTU-2100-005Regular price £15.99Regular priceUnit price / per£15.99Sale price £15.99in stock -

Oghu Lobbers, Wild Oghurüc Unit [digital]
ABN-FTU-3775 ABN-FTU-3775Oghu Lobbers, Wild Oghurüc Unit [digital]
ABN-FTU-3775 ABN-FTU-3775Regular price from £24.99Regular priceUnit price / per£24.99Sale price from £24.99in stock -

Oghu Slashers, Vicious Oghurüc Unit [digital]
ABN-FTU-3770 ABN-FTU-3770Oghu Slashers, Vicious Oghurüc Unit [digital]
ABN-FTU-3770 ABN-FTU-3770Regular price from £24.99Regular priceUnit price / per£24.99Sale price from £24.99in stock -

Kuurkurak, Barbarous Greatmaw
FMR-CND-8900 FMR-CND-8900Kuurkurak, Barbarous Greatmaw
FMR-CND-8900 FMR-CND-8900Regular price £99.99Regular priceUnit price / per£99.99Sale price £99.99made to order -

Kaairioc-cró, Pitiless Dainöch
FMR-CND-8870 FMR-CND-8870Kaairioc-cró, Pitiless Dainöch
FMR-CND-8870 FMR-CND-8870Regular price £99.99Regular priceUnit price / per£99.99Sale price £99.99made to order -

Thuulac, Gargantuan Deep Crab
FMR-CND-8865 FMR-CND-8865Thuulac, Gargantuan Deep Crab
FMR-CND-8865 FMR-CND-8865Regular price £79.99Regular priceUnit price / per£79.99Sale price £79.99made to order -

Encrusted Thuulac, Gargantuan Deep Crab
FMR-CND-8865-801 FMR-CND-8865-801Encrusted Thuulac, Gargantuan Deep Crab
FMR-CND-8865-801 FMR-CND-8865-801Regular price £89.99Regular priceUnit price / per£89.99Sale price £89.99made to order -

Uuthüll, Risen Kraacken
FMR-CND-8750 FMR-CND-8750Uuthüll, Risen Kraacken
FMR-CND-8750 FMR-CND-8750Regular price £124.99Regular priceUnit price / per£124.99Sale price £124.99made to order -

Tünguuska, Savage Hammerhook
FMR-CND-8450 FMR-CND-8450Tünguuska, Savage Hammerhook
FMR-CND-8450 FMR-CND-8450Regular price £89.99Regular priceUnit price / per£89.99Sale price £89.99made to order -

Scuttling Nucránca, Crabspear Unit
FMR-CND-8100 FMR-CND-8100Scuttling Nucránca, Crabspear Unit
FMR-CND-8100 FMR-CND-8100Regular price from £59.99Regular priceUnit price / per£59.99Sale price from £59.99made to order -

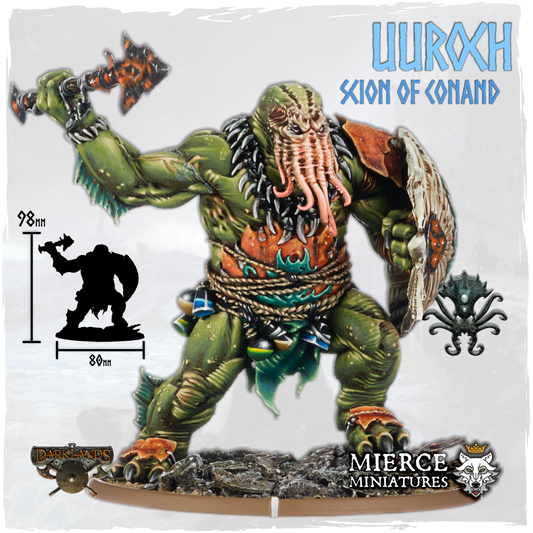
Uuroch, Scion of Conand
FMR-CND-0100 FMR-CND-0100Uuroch, Scion of Conand
FMR-CND-0100 FMR-CND-0100Regular price from £39.99Regular priceUnit price / per£39.99Sale price from £39.99made to order -

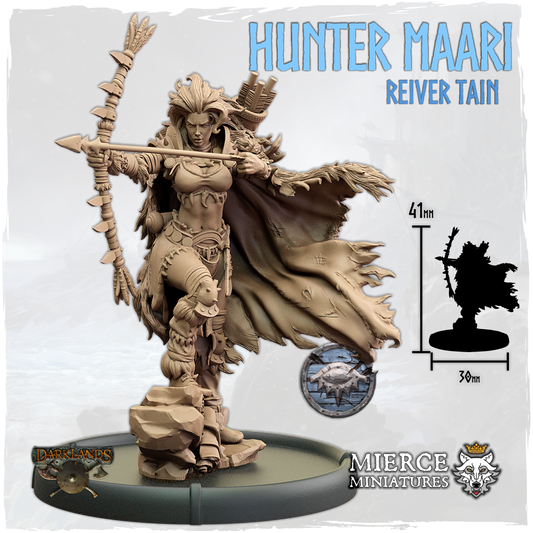
Hunter Maari, Reiver Tain [digital]
FMR-RVE-1273 FMR-RVE-1273Hunter Maari, Reiver Tain [digital]
FMR-RVE-1273 FMR-RVE-1273FMR-RVE-1273 Fomoraic - Reivers of the EyeRegular price from £3.99Regular priceUnit price / per£3.99Sale price from £3.99in stock -

Klóstiss, Shaper of Khthon [digital]
KTH-GOR-1570 KTH-GOR-1570Klóstiss, Shaper of Khthon [digital]
KTH-GOR-1570 KTH-GOR-1570Regular price £5.99Regular priceUnit price / per£5.99Sale price £5.99in stock -

Grīma of Dwimorholt, Līcwāca on Horsling
JUT-CNT-0261 JUT-CNT-0261Grīma of Dwimorholt, Līcwāca on Horsling
JUT-CNT-0261 JUT-CNT-0261Regular price from £6.99Regular priceUnit price / per£6.99Sale price from £6.99made to order -


Grīma of Dwimorholt, Līcwāca on Horsling [digital]
JUT-CNT-0261 JUT-CNT-0261Grīma of Dwimorholt, Līcwāca on Horsling [digital]
JUT-CNT-0261 JUT-CNT-0261Regular price from £3.99Regular priceUnit price / per£3.99Sale price from £3.99in stock -

Maari Christmas, Festive Reiver Witch [digital]
FMR-RVE-1275-100 FMR-RVE-1275-100Maari Christmas, Festive Reiver Witch [digital]
FMR-RVE-1275-100 FMR-RVE-1275-100FMR-RVE-1275-100 Fomoraic - Reivers of the EyeRegular price £3.99Regular priceUnit price / per£3.99Sale price £3.99in stock -

Baart's Warband, Reiver Hunter Horse Unit [digital]
FMR-RVE-4400-005 FMR-RVE-4400-005Baart's Warband, Reiver Hunter Horse Unit [digital]
FMR-RVE-4400-005 FMR-RVE-4400-005FMR-RVE-4400-005 Fomoraic - Reivers of the EyeRegular price £23.99Regular priceUnit price / per£23.99Sale price £23.99in stock -

Raabert's Warband, Reiver Horse Unit [digital]
FMR-RVE-4200-007 FMR-RVE-4200-007Raabert's Warband, Reiver Horse Unit [digital]
FMR-RVE-4200-007 FMR-RVE-4200-007FMR-RVE-4200-007 Fomoraic - Reivers of the EyeRegular price £32.49Regular priceUnit price / per£32.49Sale price £32.49in stock -

Baart's Warband, Reiver Hunter Unit [digital]
FMR-RVE-2400-005 FMR-RVE-2400-005Baart's Warband, Reiver Hunter Unit [digital]
FMR-RVE-2400-005 FMR-RVE-2400-005FMR-RVE-2400-005 Fomoraic - Reivers of the EyeRegular price £11.99Regular priceUnit price / per£11.99Sale price £11.99in stock -

Baara's Warband, Two Axe Reiver Unit [digital]
FMR-RVE-2220-007 FMR-RVE-2220-007Baara's Warband, Two Axe Reiver Unit [digital]
FMR-RVE-2220-007 FMR-RVE-2220-007FMR-RVE-2220-007 Fomoraic - Reivers of the EyeRegular price £15.99Regular priceUnit price / per£15.99Sale price £15.99in stock -

Raab's Warband, Great Axe Reiver Unit [digital]
FMR-RVE-2210-007 FMR-RVE-2210-007Raab's Warband, Great Axe Reiver Unit [digital]
FMR-RVE-2210-007 FMR-RVE-2210-007FMR-RVE-2210-007 Fomoraic - Reivers of the EyeRegular price £15.99Regular priceUnit price / per£15.99Sale price £15.99in stock -

Raabert's Warband, Shieldwall Reiver Unit [digital]
FMR-RVE-2200-007 FMR-RVE-2200-007Raabert's Warband, Shieldwall Reiver Unit [digital]
FMR-RVE-2200-007 FMR-RVE-2200-007FMR-RVE-2200-007 Fomoraic - Reivers of the EyeRegular price £15.99Regular priceUnit price / per£15.99Sale price £15.99in stock -

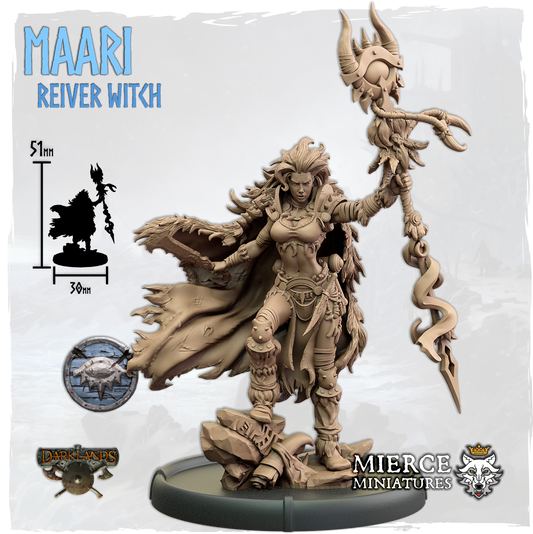
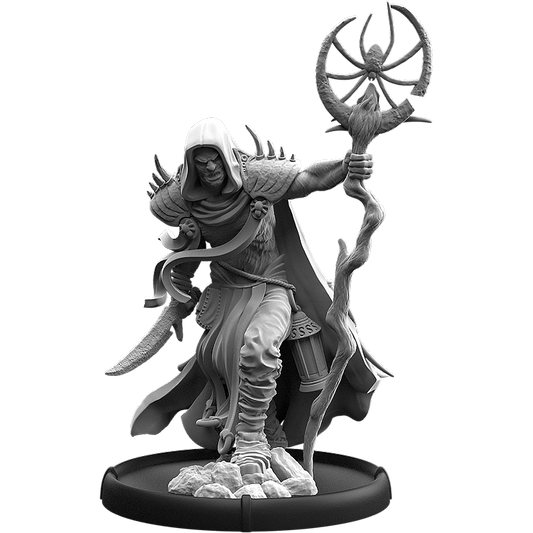
Maari, Reiver Witch [digital]
FMR-RVE-1270 FMR-RVE-1270Maari, Reiver Witch [digital]
FMR-RVE-1270 FMR-RVE-1270FMR-RVE-1270 Fomoraic - Reivers of the EyeRegular price from £3.99Regular priceUnit price / per£3.99Sale price from £3.99in stock -

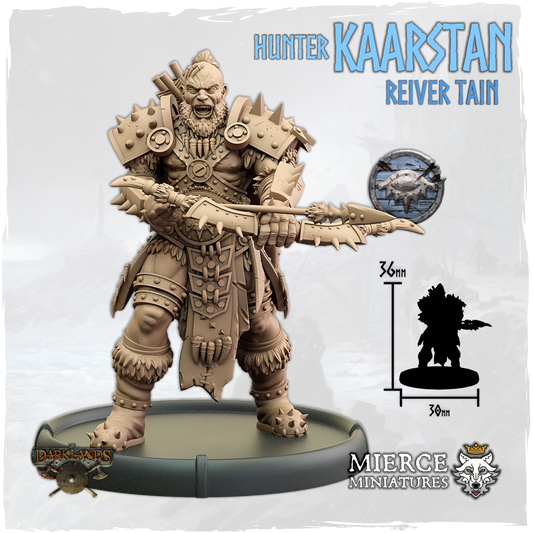
Hunter Kaarstan, Reiver Tain [digital]
FMR-RVE-1203 FMR-RVE-1203Hunter Kaarstan, Reiver Tain [digital]
FMR-RVE-1203 FMR-RVE-1203FMR-RVE-1203 Fomoraic - Reivers of the EyeRegular price from £3.99Regular priceUnit price / per£3.99Sale price from £3.99in stock -

Two Axe Kaarstan, Reiver Tain [digital]
FMR-RVE-1202-100 FMR-RVE-1202-100Two Axe Kaarstan, Reiver Tain [digital]
FMR-RVE-1202-100 FMR-RVE-1202-100FMR-RVE-1202-100 Fomoraic - Reivers of the EyeRegular price £3.99Regular priceUnit price / per£3.99Sale price £3.99in stock -

Great Axe Kaarstan, Reiver Tain [digital]
FMR-RVE-1201-100 FMR-RVE-1201-100Great Axe Kaarstan, Reiver Tain [digital]
FMR-RVE-1201-100 FMR-RVE-1201-100FMR-RVE-1201-100 Fomoraic - Reivers of the EyeRegular price £3.99Regular priceUnit price / per£3.99Sale price £3.99in stock -

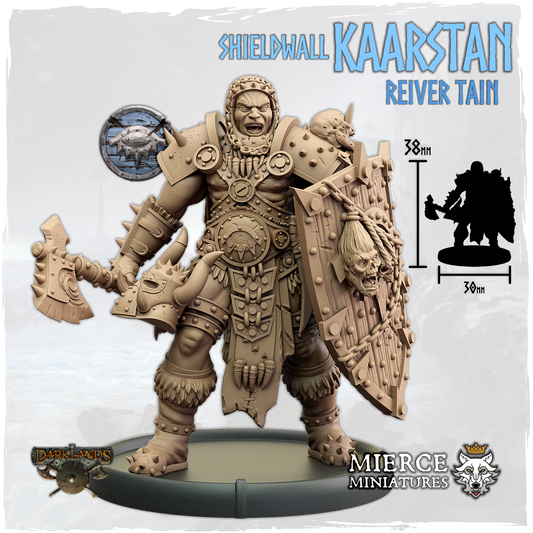
Shieldwall Kaarstan, Reiver Tain [digital]
FMR-RVE-1200 FMR-RVE-1200Shieldwall Kaarstan, Reiver Tain [digital]
FMR-RVE-1200 FMR-RVE-1200FMR-RVE-1200 Fomoraic - Reivers of the EyeRegular price from £3.99Regular priceUnit price / per£3.99Sale price from £3.99in stock -

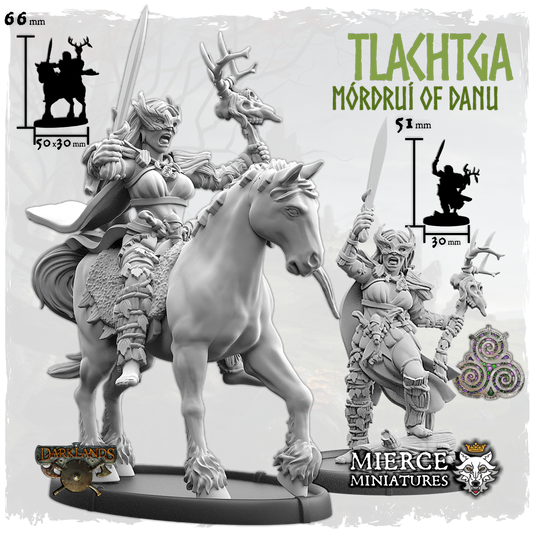
Tlachtga, Mórdruí of Danu on Pony
ERN-UNL-0260 ERN-UNL-0260Tlachtga, Mórdruí of Danu on Pony
ERN-UNL-0260 ERN-UNL-0260Regular price from £7.99Regular priceUnit price / per£7.99Sale price from £7.99in stock -
![Iskarnos, Szalamakh [digital]](//mierce-miniatures.com/cdn/shop/files/mierce-khthones-savra-iskarnos-szalamakh_01_large_e500e57b-5248-4ec2-8502-8eef2ce5e22a.png?v=1765973129&width=533)

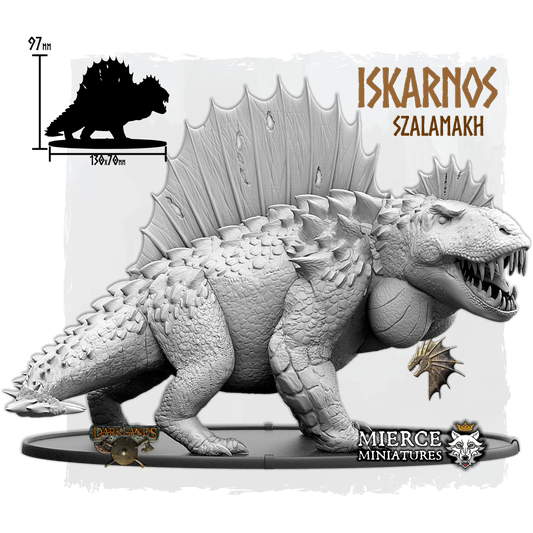
Iskarnos, Szalamakh [digital]
KTH-SAV-8565 KTH-SAV-8565Iskarnos, Szalamakh [digital]
KTH-SAV-8565 KTH-SAV-8565Regular price £14.99Regular priceUnit price / per£14.99Sale price £14.99in stock -

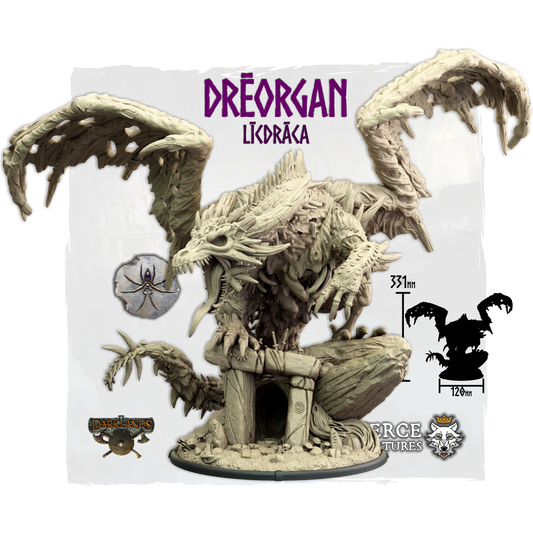
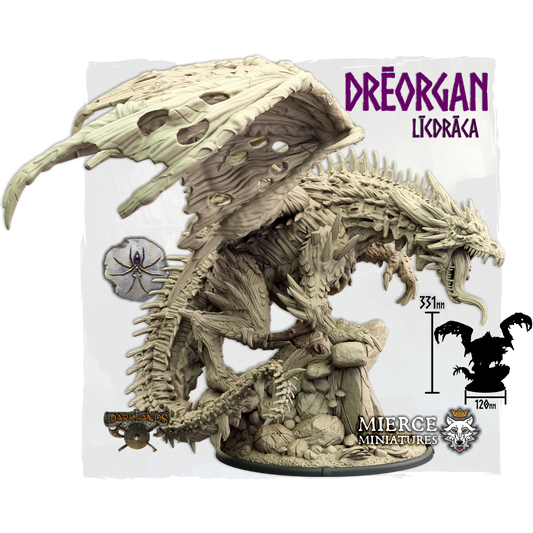
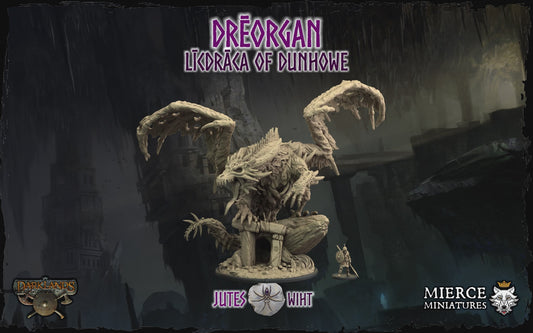
Drēorgan, Līcdrāca of Dunhowe [digital]
JUT-WHT-8820 JUT-WHT-8820Drēorgan, Līcdrāca of Dunhowe [digital]
JUT-WHT-8820 JUT-WHT-8820Regular price £39.99Regular priceUnit price / per£39.99Sale price £39.99in stock -

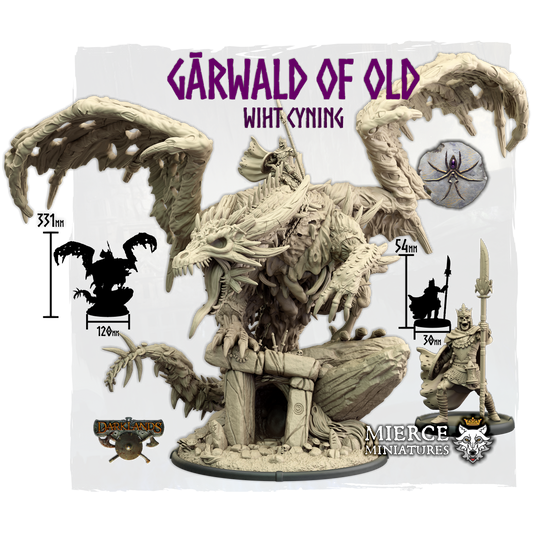
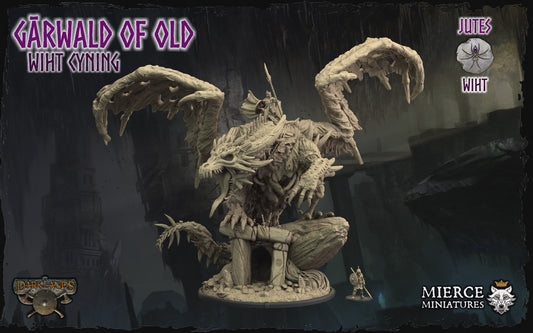
Gārwald of Old, Wiht Cyning [digital]
JUT-WHT-0200 JUT-WHT-0200Gārwald of Old, Wiht Cyning [digital]
JUT-WHT-0200 JUT-WHT-0200Regular price from £3.99Regular priceUnit price / per£3.99Sale price from £3.99in stock -
![Uuluu, Titanic Backwhale [digital]](//mierce-miniatures.com/cdn/shop/files/mierce-fomoraic-conand-uuluu-titanic-backwhale_01_large_b6ac9dc8-525b-469f-b6f2-6eccefbcd893.png?v=1762773291&width=533)
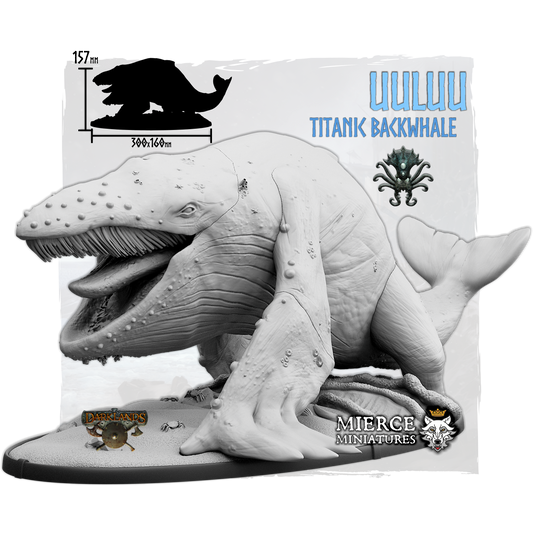
Uuluu, Titanic Backwhale [digital]
FMR-CND-8965 FMR-CND-8965Uuluu, Titanic Backwhale [digital]
FMR-CND-8965 FMR-CND-8965Regular price £39.99Regular priceUnit price / per£39.99Sale price £39.99in stock -

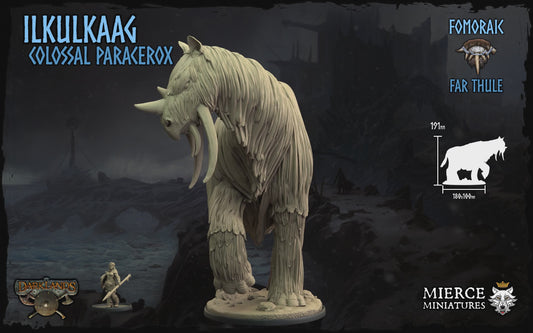
Ilkulkaag, Colossal Paracerox [digital]
FMR-THL-8820 FMR-THL-8820Ilkulkaag, Colossal Paracerox [digital]
FMR-THL-8820 FMR-THL-8820Regular price £39.99Regular priceUnit price / per£39.99Sale price £39.99in stock -

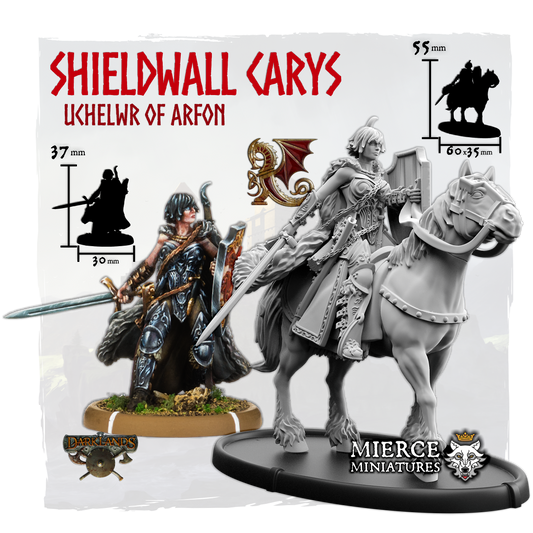
Shieldwall Carys, Uchelwr of Arfon [digital]
BRY-GWY-1210 BRY-GWY-1210Shieldwall Carys, Uchelwr of Arfon [digital]
BRY-GWY-1210 BRY-GWY-1210BRY-GWY-1210 Brythoniaid - GwyneddRegular price from £3.99Regular priceUnit price / per£3.99Sale price from £3.99made to order -

Draiggyn Urien, Teyrn of Môn [digital]
BRY-GWY-0204 BRY-GWY-0204Draiggyn Urien, Teyrn of Môn [digital]
BRY-GWY-0204 BRY-GWY-0204BRY-GWY-0204 Brythoniaid - GwyneddRegular price from £3.99Regular priceUnit price / per£3.99Sale price from £3.99in stock -

Ilios Slayers, Khalkotes Gamma Unit [digital]
ATL-ILS-2130-005 ATL-ILS-2130-005Ilios Slayers, Khalkotes Gamma Unit [digital]
ATL-ILS-2130-005 ATL-ILS-2130-005Regular price from £2.99Regular priceUnit price / per£2.99Sale price from £2.99in stock -

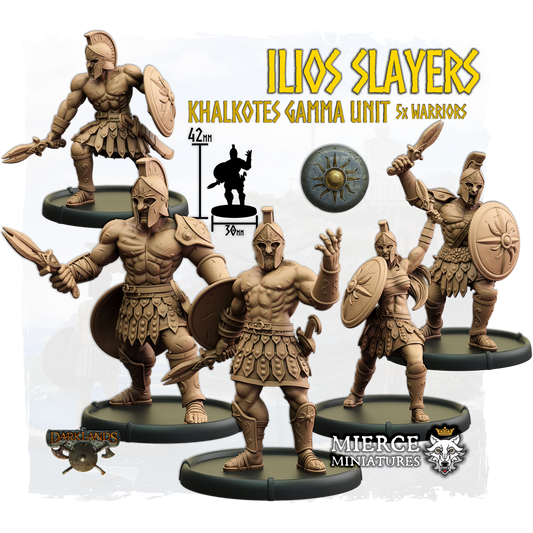
Ilios Slayers, Khalkotes Gamma Unit
ATL-ILS-2130-105 ATL-ILS-2130-105Ilios Slayers, Khalkotes Gamma Unit
ATL-ILS-2130-105 ATL-ILS-2130-105Regular price from £4.49Regular priceUnit price / per£4.49Sale price from £4.49made to order -

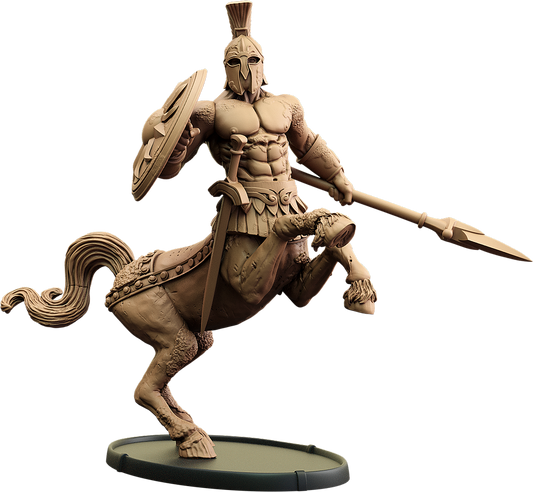
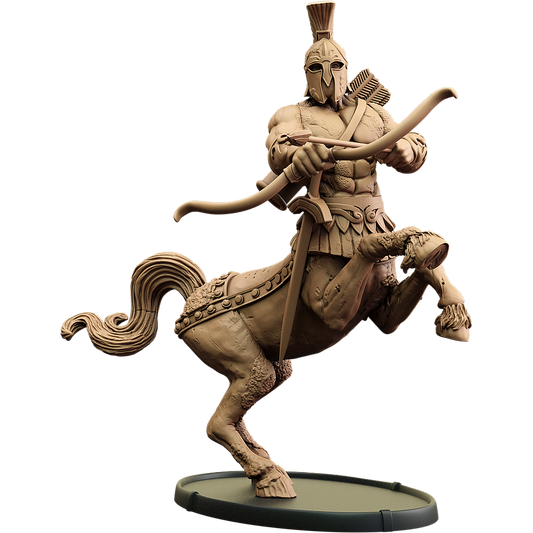
The Charging Ones, Kentaurokolossos Unit [digital]
ATL-ILS-5150 ATL-ILS-5150The Charging Ones, Kentaurokolossos Unit [digital]
ATL-ILS-5150 ATL-ILS-5150Regular price from £6.99Regular priceUnit price / per£6.99Sale price from £6.99in stock -

Sunspear Thera, Lokhagos of Ilios [digital]
ATL-ILS-1215-100 ATL-ILS-1215-100Sunspear Thera, Lokhagos of Ilios [digital]
ATL-ILS-1215-100 ATL-ILS-1215-100Regular price £3.99Regular priceUnit price / per£3.99Sale price £3.99in stock -
![Sunspear Thera [Pin Up], Lokhagos of Ilios on Foot](//mierce-miniatures.com/cdn/shop/files/mierce-atalantes-ilios-sunspear-thera-pin-up-lokhagos-of-ilios-on-foot_01_large_a7cc6cdd-31eb-4667-9ffc-475f41ca4b18.png?v=1762439837&width=533)
Sunspear Thera, Lokhagos of Ilios [Pin Up]
ATL-ILS-1215-900 ATL-ILS-1215-900Sunspear Thera, Lokhagos of Ilios [Pin Up]
ATL-ILS-1215-900 ATL-ILS-1215-900Regular price £7.99Regular priceUnit price / per£7.99Sale price £7.99in stock -

Sunspear Thera, Lokhagos of Ilios
ATL-ILS-1215-100 ATL-ILS-1215-100Sunspear Thera, Lokhagos of Ilios
ATL-ILS-1215-100 ATL-ILS-1215-100Regular price £7.99Regular priceUnit price / per£7.99Sale price £7.99in stock -


The Impaling Ones, Toxokentaurokolossos Unit [digital]
ATL-ILS-5180 ATL-ILS-5180The Impaling Ones, Toxokentaurokolossos Unit [digital]
ATL-ILS-5180 ATL-ILS-5180Regular price from £6.99Regular priceUnit price / per£6.99Sale price from £6.99in stock -

The Impaling Ones, Toxokentaurokolossos Unit
ATL-ILS-5180 ATL-ILS-5180The Impaling Ones, Toxokentaurokolossos Unit
ATL-ILS-5180 ATL-ILS-5180Regular price from £17.49Regular priceUnit price / per£17.49Sale price from £17.49made to order -


The Charging Ones, Kentaurokolossos Unit
ATL-ILS-5150 ATL-ILS-5150The Charging Ones, Kentaurokolossos Unit
ATL-ILS-5150 ATL-ILS-5150Regular price from £17.49Regular priceUnit price / per£17.49Sale price from £17.49made to order -
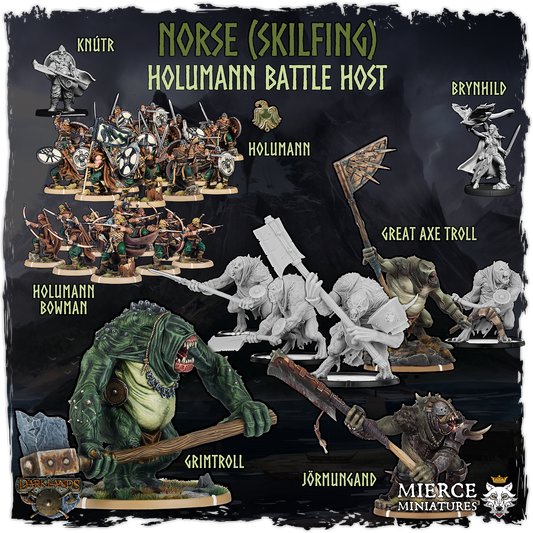
![Norse (Skilfing) Holumann Battle Host [digital]](//mierce-miniatures.com/cdn/shop/files/00-norse-skilfing-battle-host-01_ffbb4c09-271e-40c4-82cf-b83d2e791467.jpg?v=1770896897&width=533)
Norse (Skilfing) Holumann Battle Host [digital]
NOR-SFG-0000-DH1 NOR-SFG-0000-DH1Norse (Skilfing) Holumann Battle Host [digital]
NOR-SFG-0000-DH1 NOR-SFG-0000-DH1Regular price £49.99Regular priceUnit price / per£49.99Sale price £49.99in stock -

Olympia Delta, Stratekórikolossos [digital]
ATL-ILS-1414 ATL-ILS-1414Olympia Delta, Stratekórikolossos [digital]
ATL-ILS-1414 ATL-ILS-1414Regular price £4.99Regular priceUnit price / per£4.99Sale price £4.99in stock -
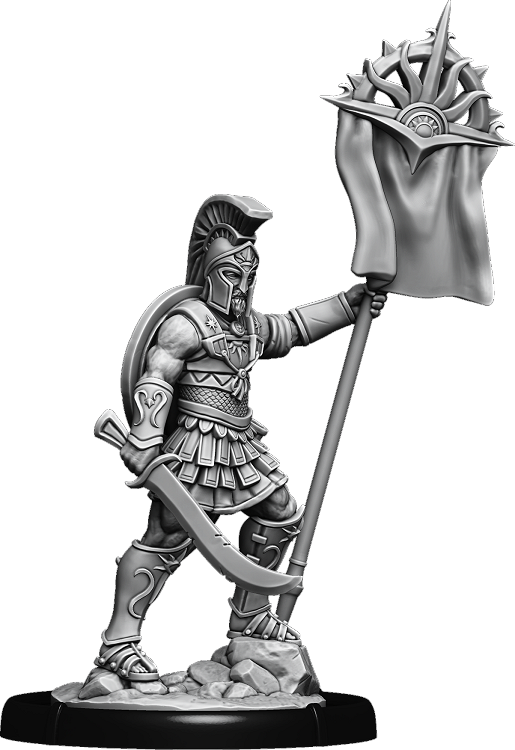
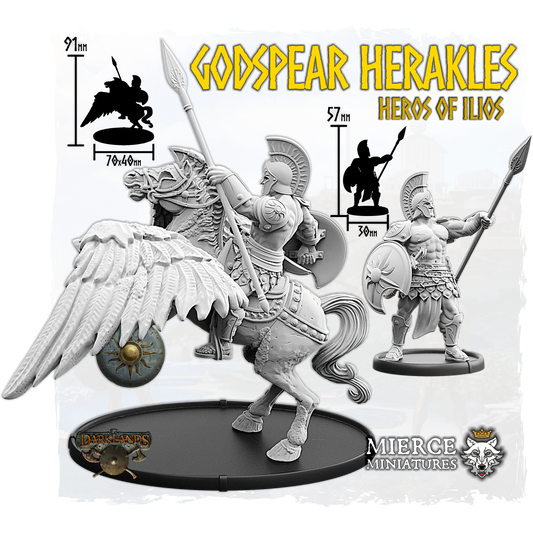
![Godspear Herakles, Heros of Ilios [digital]](//mierce-miniatures.com/cdn/shop/files/mierce-atalantes-ilios-godspear-herakles-heros-of-ilios_01_large_1901904e-5f09-4643-9bbb-008cf4af08a9.png?v=1761127464&width=533)

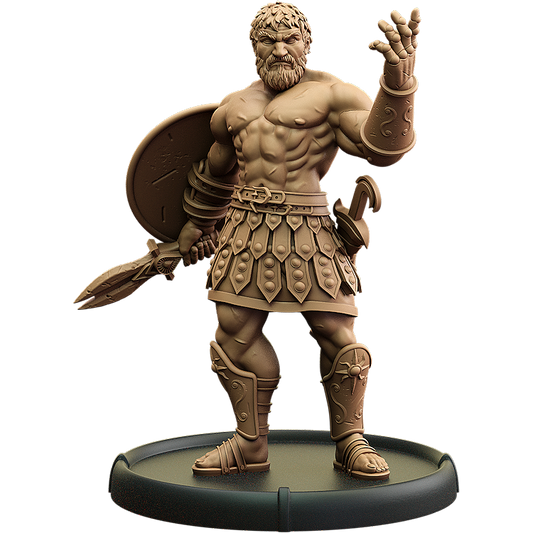
Godspear Herakles, Heros of Ilios [digital]
ATL-ILS-0223 ATL-ILS-0223Godspear Herakles, Heros of Ilios [digital]
ATL-ILS-0223 ATL-ILS-0223Regular price £12.49Regular priceUnit price / per£12.49Sale price £12.49in stock -
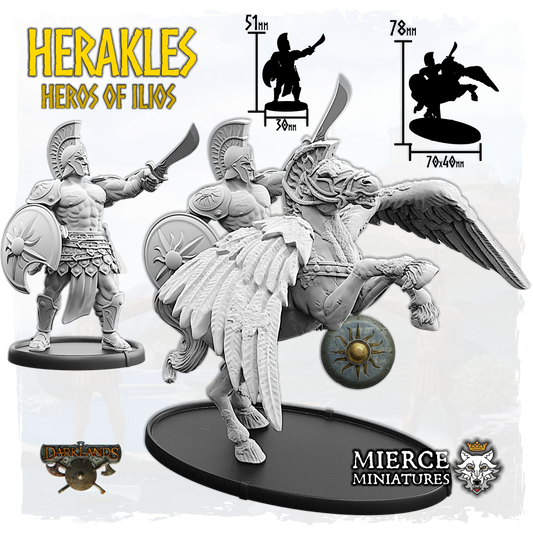
![Herakles, Heros of Ilios [digital]](//mierce-miniatures.com/cdn/shop/files/mierce-atalantes-ilios-herakles-heros-of-ilios_01_large_5e8179c8-7f55-42bb-8d19-d2d655358e4b.png?v=1761127460&width=533)
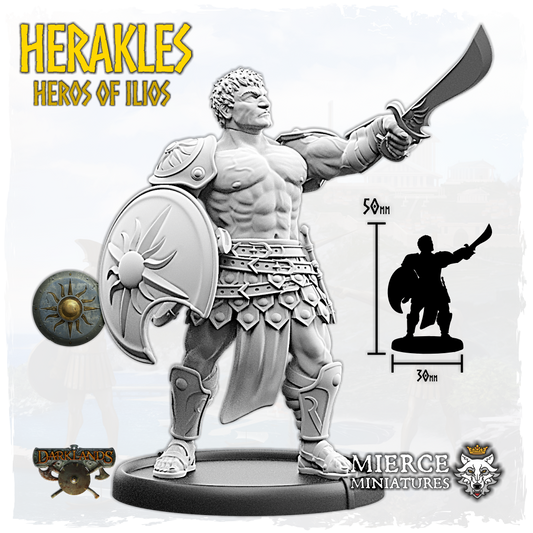
Herakles, Heros of Ilios [digital]
ATL-ILS-0220 ATL-ILS-0220Herakles, Heros of Ilios [digital]
ATL-ILS-0220 ATL-ILS-0220Regular price £12.49Regular priceUnit price / per£12.49Sale price £12.49in stock -
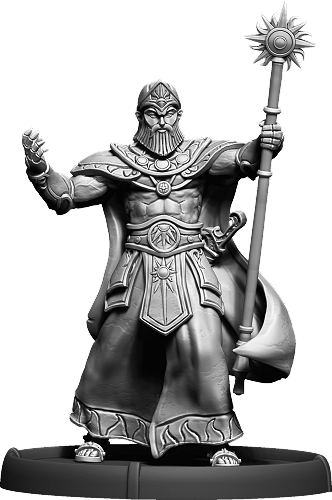
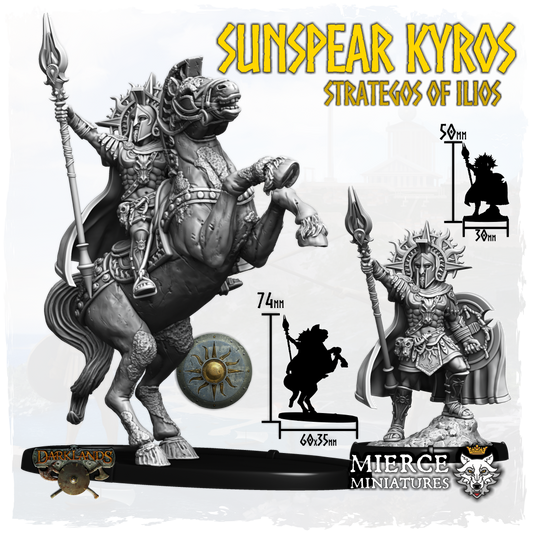
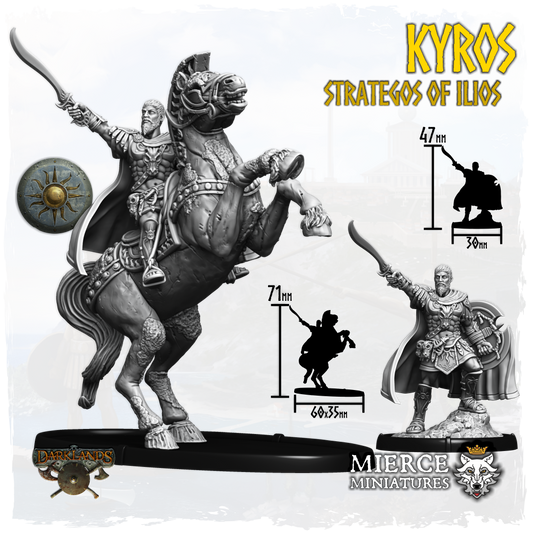
![Sunspear Kyros, Strategos of Ilios [digital]](//mierce-miniatures.com/cdn/shop/files/mierce-atalantes-ilios-sunspear-kyros-strategos-of-ilios_01_large_3bd55860-5d1a-42da-ad49-c6b92187a0b0.png?v=1761127457&width=533)
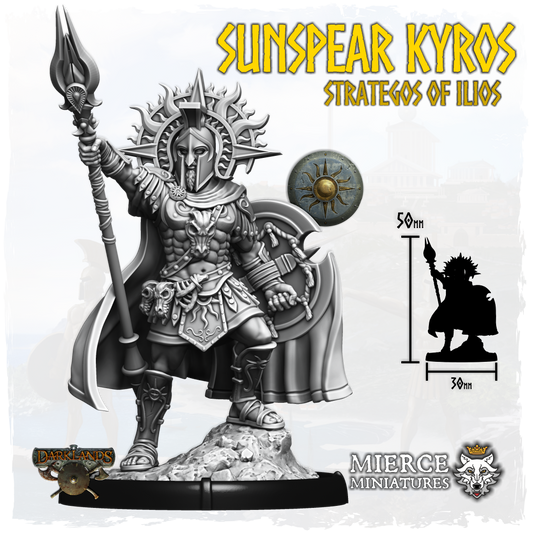
Sunspear Kyros, Strategos of Ilios [digital]
ATL-ILS-0203 ATL-ILS-0203Sunspear Kyros, Strategos of Ilios [digital]
ATL-ILS-0203 ATL-ILS-0203Regular price £10.99Regular priceUnit price / per£10.99Sale price £10.99in stock -
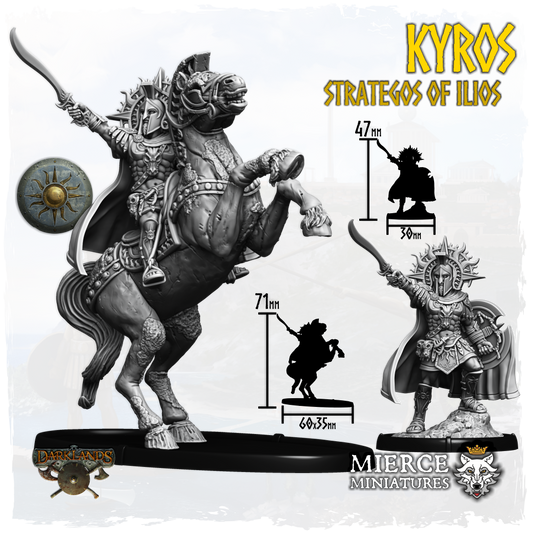
![Kyros, Strategos of Ilios [digital]](//mierce-miniatures.com/cdn/shop/files/mierce-atalantes-ilios-kyros-strategos-of-ilios_01_large_b3d38f44-c124-4259-ac35-e94ce5984354.png?v=1761127454&width=533)
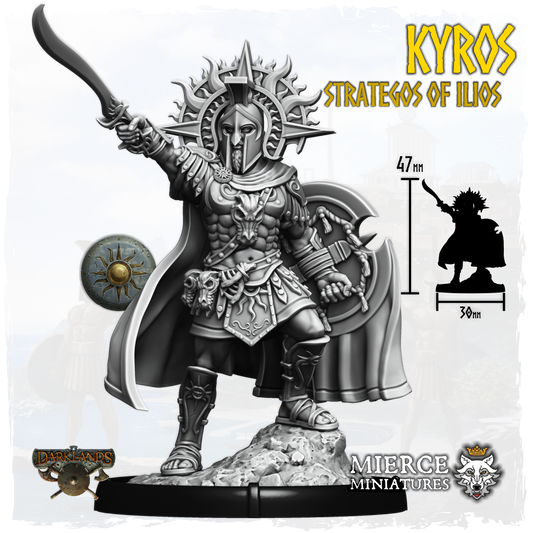
Kyros, Strategos of Ilios [digital]
ATL-ILS-0200 ATL-ILS-0200Kyros, Strategos of Ilios [digital]
ATL-ILS-0200 ATL-ILS-0200Regular price £10.99Regular priceUnit price / per£10.99Sale price £10.99in stock -


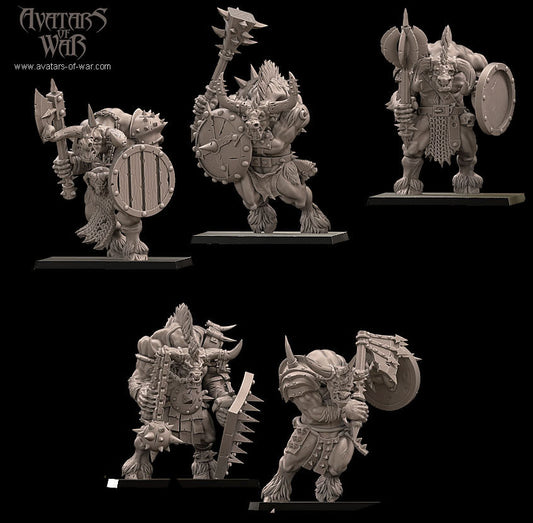
Mama Troll
AVW-GOB-0500 AVW-GOB-0500Mama Troll
AVW-GOB-0500 AVW-GOB-0500Avatars of War Avatars of WarRegular price £29.99Regular priceUnit price / per£29.99Sale price £29.99made to order -

Cynescipe, Leofwen's Dēran Unit [digital]
ANG-DRA-7831 ANG-DRA-7831Cynescipe, Leofwen's Dēran Unit [digital]
ANG-DRA-7831 ANG-DRA-7831Regular price from £5.49Regular priceUnit price / per£5.49Sale price from £5.49in stock -


Skyclad Itaina, Umaer of Dun Durn [digital]
ABN-FTU-1212 ABN-FTU-1212Skyclad Itaina, Umaer of Dun Durn [digital]
ABN-FTU-1212 ABN-FTU-1212Regular price from £3.99Regular priceUnit price / per£3.99Sale price from £3.99in stock -
Gārwald of Old, Wiht Cyning
JUT-WHT-0200 JUT-WHT-0200Gārwald of Old, Wiht Cyning
JUT-WHT-0200 JUT-WHT-0200Regular price from £7.99Regular priceUnit price / per£7.99Sale price from £7.99available to order -
Drēorgan, Līcdrāca of Dunhowe
JUT-WHT-8820 JUT-WHT-8820Drēorgan, Līcdrāca of Dunhowe
JUT-WHT-8820 JUT-WHT-8820Regular price £299.99Regular priceUnit price / per£299.99Sale price £299.99available to order -
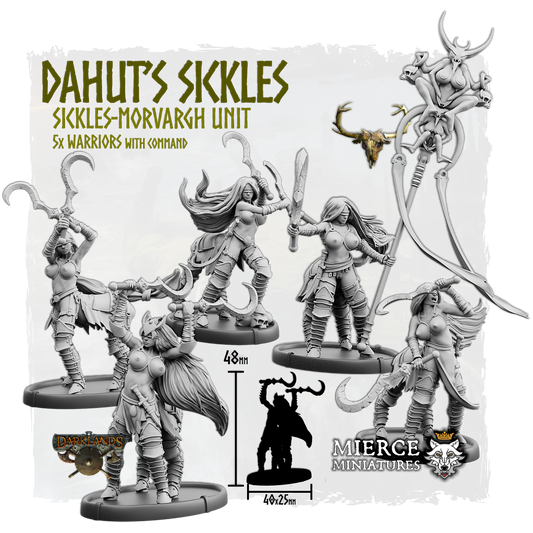

Dahut's Sickles, Sickles-Morvargh Unit
YSN-KYS-4040-005 YSN-KYS-4040-005Dahut's Sickles, Sickles-Morvargh Unit
YSN-KYS-4040-005 YSN-KYS-4040-005Regular price from £5.99Regular priceUnit price / per£5.99Sale price from £5.99in stock -
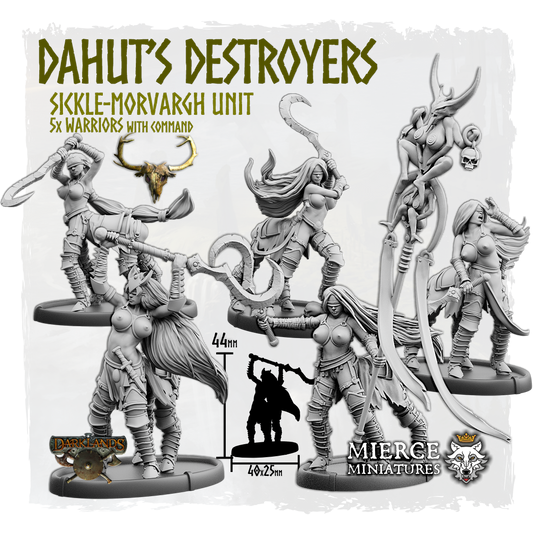
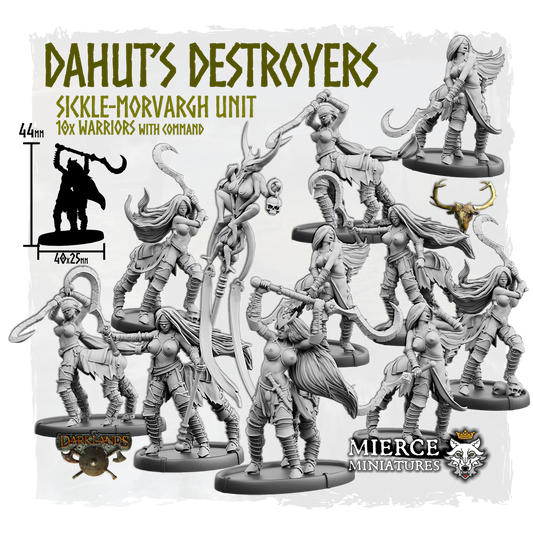
Dahut's Destroyers, Sickle-Morvargh Unit
YSN-KYS-4030-005 YSN-KYS-4030-005Dahut's Destroyers, Sickle-Morvargh Unit
YSN-KYS-4030-005 YSN-KYS-4030-005Regular price from £5.99Regular priceUnit price / per£5.99Sale price from £5.99in stock -
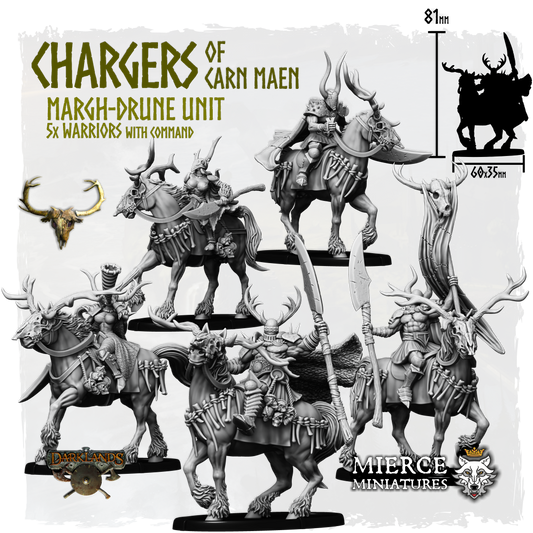
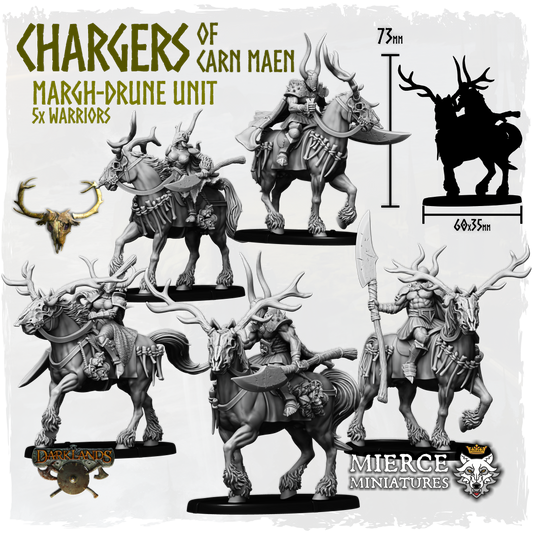
Chargers of Carn Maen, Margh-Drune Unit
YSN-KYS-4110-005-F YSN-KYS-4110-005-FChargers of Carn Maen, Margh-Drune Unit
YSN-KYS-4110-005-F YSN-KYS-4110-005-FRegular price from £12.49Regular priceUnit price / per£12.49Sale price from £12.49made to order -
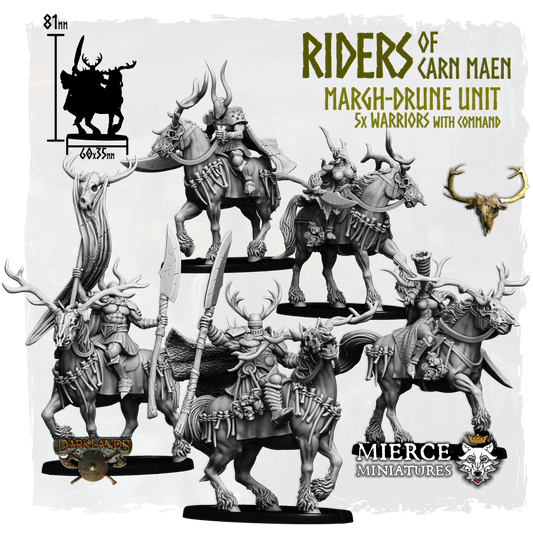
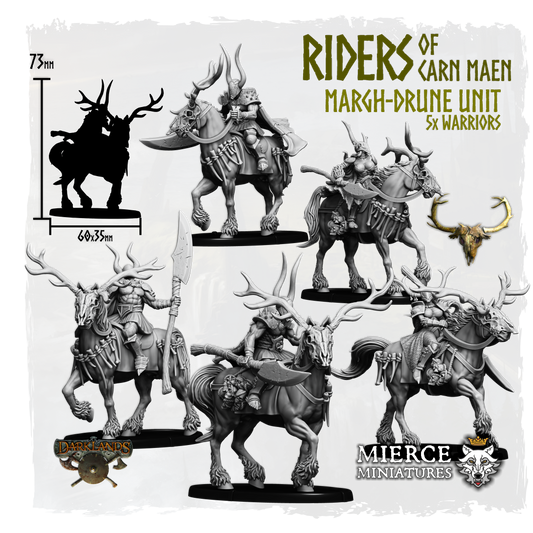
Riders of Carn Maen, Margh-Drune Unit
YSN-KYS-4110-005 YSN-KYS-4110-005Riders of Carn Maen, Margh-Drune Unit
YSN-KYS-4110-005 YSN-KYS-4110-005Regular price from £12.49Regular priceUnit price / per£12.49Sale price from £12.49made to order -
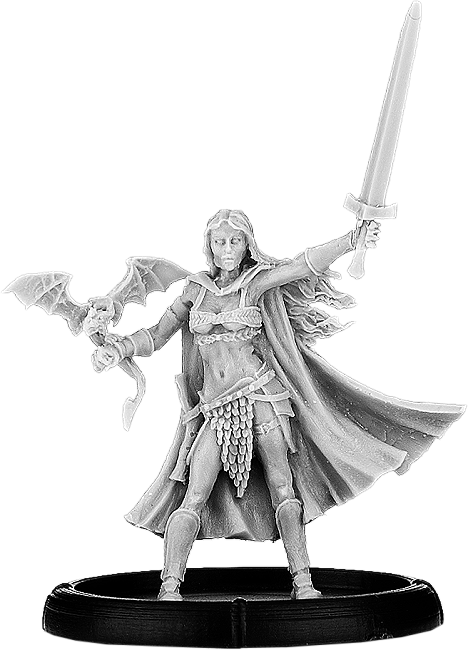
Warrior Ffion, Bard of Gwynedd
BRY-GWY-1296-100 BRY-GWY-1296-100Warrior Ffion, Bard of Gwynedd
BRY-GWY-1296-100 BRY-GWY-1296-100BRY-GWY-1296-100 Brythoniaid - GwyneddRegular price £14.99Regular priceUnit price / per£14.99Sale price £14.99made to order -
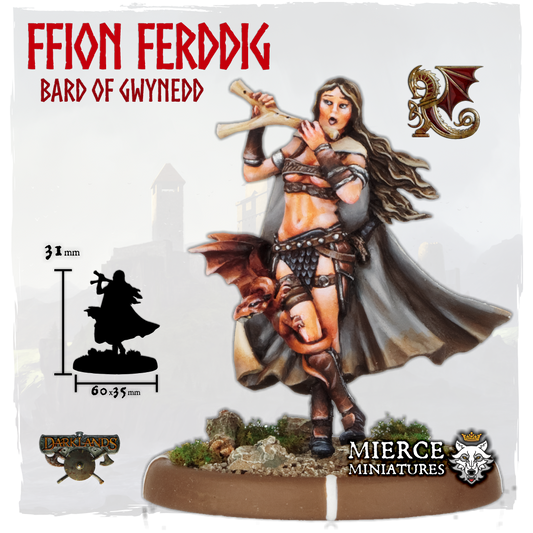
Ffion Ferddig, Bard of Gwynedd
BRY-GWY-1295-100 BRY-GWY-1295-100Ffion Ferddig, Bard of Gwynedd
BRY-GWY-1295-100 BRY-GWY-1295-100BRY-GWY-1295-100 Brythoniaid - GwyneddRegular price £14.99Regular priceUnit price / per£14.99Sale price £14.99made to order -
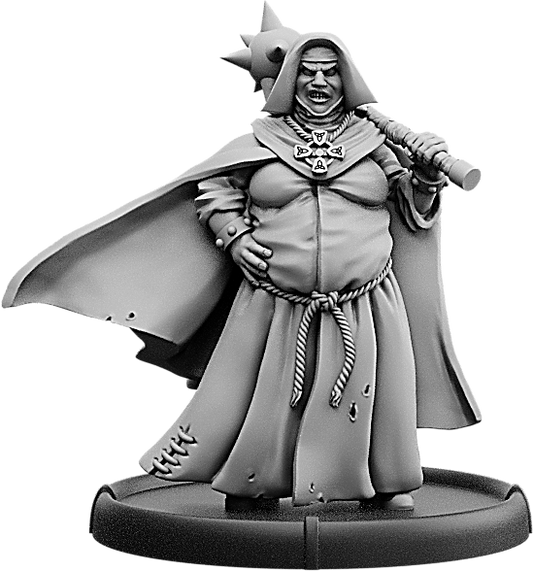
Nerys, Abades of Penmôn
BRY-GWY-1256-100 BRY-GWY-1256-100Nerys, Abades of Penmôn
BRY-GWY-1256-100 BRY-GWY-1256-100BRY-GWY-1256-100 Brythoniaid - GwyneddRegular price £7.99Regular priceUnit price / per£7.99Sale price £7.99made to order -
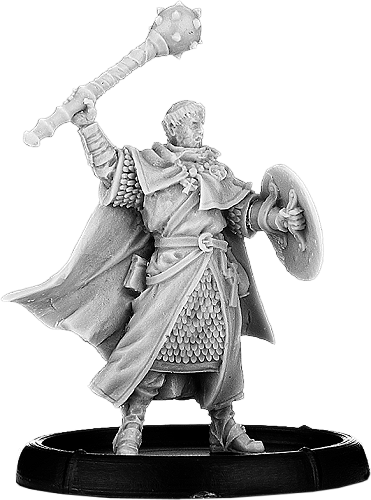
Tonsured Caedoc, Abad of Becelert
BRY-GWY-1250-190 BRY-GWY-1250-190Tonsured Caedoc, Abad of Becelert
BRY-GWY-1250-190 BRY-GWY-1250-190BRY-GWY-1250-190 Brythoniaid - GwyneddRegular price £14.99Regular priceUnit price / per£14.99Sale price £14.99made to order -
Caedoc, Abad of Becelert
BRY-GWY-1250-100 BRY-GWY-1250-100Caedoc, Abad of Becelert
BRY-GWY-1250-100 BRY-GWY-1250-100BRY-GWY-1250-100 Brythoniaid - GwyneddRegular price £14.99Regular priceUnit price / per£14.99Sale price £14.99made to order -
Warrior Hywel Hir, Uchelwr of Gwynedd
BRY-GWY-1231-100 BRY-GWY-1231-100Warrior Hywel Hir, Uchelwr of Gwynedd
BRY-GWY-1231-100 BRY-GWY-1231-100BRY-GWY-1231-100 Brythoniaid - GwyneddRegular price £14.99Regular priceUnit price / per£14.99Sale price £14.99made to order -
Hywel Hir, Dragon Bearer of Gwynedd
BRY-GWY-1230-100 BRY-GWY-1230-100Hywel Hir, Dragon Bearer of Gwynedd
BRY-GWY-1230-100 BRY-GWY-1230-100BRY-GWY-1230-100 Brythoniaid - GwyneddRegular price £17.49Regular priceUnit price / per£17.49Sale price £17.49made to order -
Helwr Carys, Uchelwr of Arfon
BRY-GWY-1213-140 BRY-GWY-1213-140Helwr Carys, Uchelwr of Arfon
BRY-GWY-1213-140 BRY-GWY-1213-140BRY-GWY-1213-140 Brythoniaid - GwyneddRegular price £7.99Regular priceUnit price / per£7.99Sale price £7.99made to order -

Saethwr Carys, Uchelwr of Arfon
BRY-GWY-1213-100 BRY-GWY-1213-100Saethwr Carys, Uchelwr of Arfon
BRY-GWY-1213-100 BRY-GWY-1213-100BRY-GWY-1213-100 Brythoniaid - GwyneddRegular price £7.99Regular priceUnit price / per£7.99Sale price £7.99made to order -
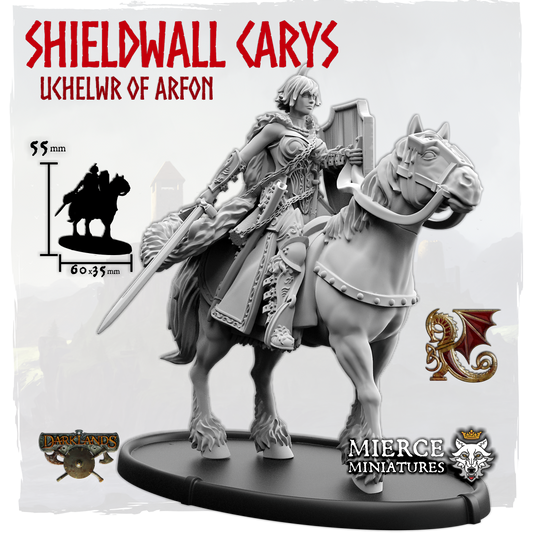
Shieldwall Carys, Uchelwr of Arfon
BRY-GWY-1210 BRY-GWY-1210Shieldwall Carys, Uchelwr of Arfon
BRY-GWY-1210 BRY-GWY-1210BRY-GWY-1210 Brythoniaid - GwyneddRegular price from £7.99Regular priceUnit price / per£7.99Sale price from £7.99made to order -

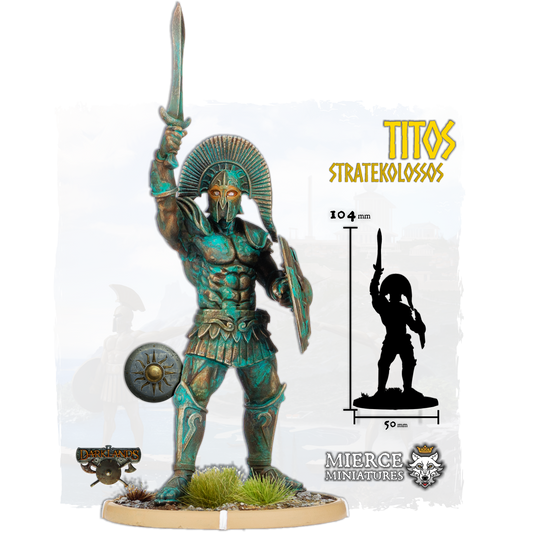
Titos Sigma, Stratekolossos
ATL-ILS-1500-310 ATL-ILS-1500-310Titos Sigma, Stratekolossos
ATL-ILS-1500-310 ATL-ILS-1500-310Regular price £14.99Regular priceUnit price / per£12.49Sale price £14.99made to order -
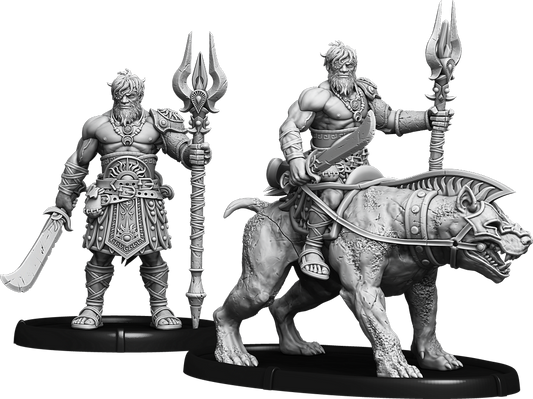
Titos, Stratekolossos
ATL-ILS-1500 ATL-ILS-1500Titos, Stratekolossos
ATL-ILS-1500 ATL-ILS-1500Regular price £14.99Regular priceUnit price / per£12.49Sale price £14.99made to order -
Hektor, Tekhnomántis of Ilios
ATL-ILS-1280 ATL-ILS-1280Hektor, Tekhnomántis of Ilios
ATL-ILS-1280 ATL-ILS-1280Regular price from £7.99Regular priceUnit price / per£6.99Sale price from £7.99made to order -
Nikandros, Kynigos of Ilios
ATL-ILS-1276-100 ATL-ILS-1276-100Nikandros, Kynigos of Ilios
ATL-ILS-1276-100 ATL-ILS-1276-100Regular price £7.99Regular priceUnit price / per£6.99Sale price £7.99made to order -
Baltazar, Thaumaturgós of Ilios
ATL-ILS-1260-100 ATL-ILS-1260-100Baltazar, Thaumaturgós of Ilios
ATL-ILS-1260-100 ATL-ILS-1260-100Regular price £7.99Regular priceUnit price / per£6.99Sale price £7.99made to order -
Haimon of Argyre, Semeiophoros of Ilios
ATL-ILS-1230-100 ATL-ILS-1230-100Haimon of Argyre, Semeiophoros of Ilios
ATL-ILS-1230-100 ATL-ILS-1230-100Regular price £9.99Regular priceUnit price / per£7.49Sale price £9.99made to order -
Iliotoxotes Thera, Lokhagos of Ilios
ATL-ILS-1214-100 ATL-ILS-1214-100Iliotoxotes Thera, Lokhagos of Ilios
ATL-ILS-1214-100 ATL-ILS-1214-100Regular price £7.99Regular priceUnit price / per£6.99Sale price £7.99made to order -
Toxotes Thera, Lokhagos of Ilios
ATL-ILS-1213-100 ATL-ILS-1213-100Toxotes Thera, Lokhagos of Ilios
ATL-ILS-1213-100 ATL-ILS-1213-100Regular price £7.99Regular priceUnit price / per£6.99Sale price £7.99made to order -
Attacker Thera, Lokhagos of Ilios
ATL-ILS-1212-100 ATL-ILS-1212-100Attacker Thera, Lokhagos of Ilios
ATL-ILS-1212-100 ATL-ILS-1212-100Regular price £7.99Regular priceUnit price / per£6.99Sale price £7.99made to order -
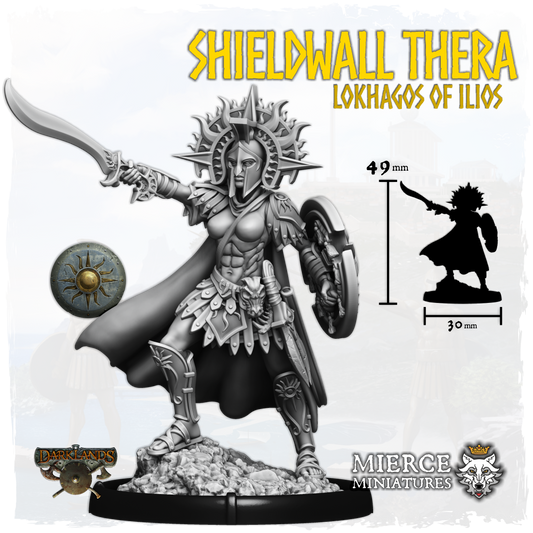
Shieldwall Thera, Lokhagos of Ilios
ATL-ILS-1210-100 ATL-ILS-1210-100Shieldwall Thera, Lokhagos of Ilios
ATL-ILS-1210-100 ATL-ILS-1210-100Regular price £7.99Regular priceUnit price / per£6.99Sale price £7.99made to order -


Goblin Wolf Rider Archer Regiment
AVW-GOB-4150 AVW-GOB-4150Goblin Wolf Rider Archer Regiment
AVW-GOB-4150 AVW-GOB-4150Avatars of War Avatars of WarRegular price £79.99Regular priceUnit price / per£79.99Sale price £79.99made to order -


Black Orc Warlord on Wyvern
AVW-BOR-0050 AVW-BOR-0050Black Orc Warlord on Wyvern
AVW-BOR-0050 AVW-BOR-0050Avatars of War Avatars of WarRegular price £99.99Regular priceUnit price / per£99.99Sale price £99.99made to order -
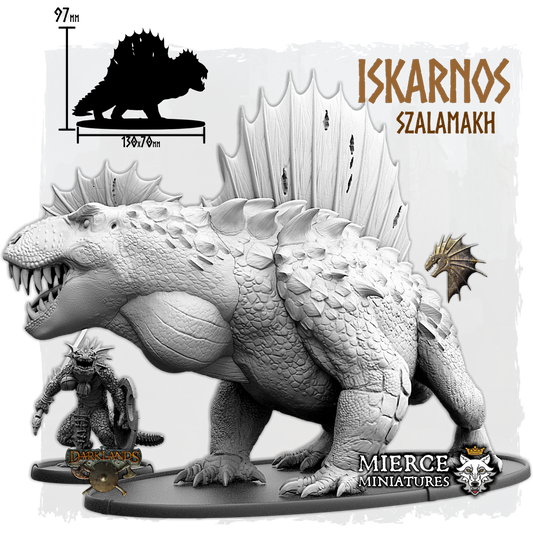
Iskarnos, Szalamakh
KTH-SAV-8565 KTH-SAV-8565Iskarnos, Szalamakh
KTH-SAV-8565 KTH-SAV-8565Regular price £79.99Regular priceUnit price / per£79.99Sale price £79.99available to order -
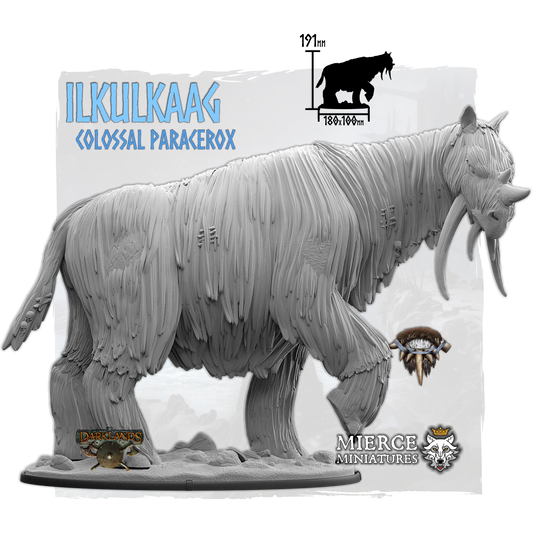
Ilkulkaag, Colossal Paracerox
FMR-THL-8820 FMR-THL-8820Ilkulkaag, Colossal Paracerox
FMR-THL-8820 FMR-THL-8820Regular price £299.99Regular priceUnit price / per£299.99Sale price £299.99available to order -
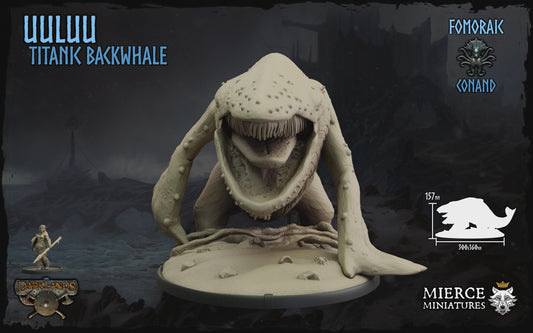
Uuluu, Titanic Backwhale
FMR-CND-8965 FMR-CND-8965Uuluu, Titanic Backwhale
FMR-CND-8965 FMR-CND-8965Regular price £299.99Regular priceUnit price / per£299.99Sale price £299.99available to order -
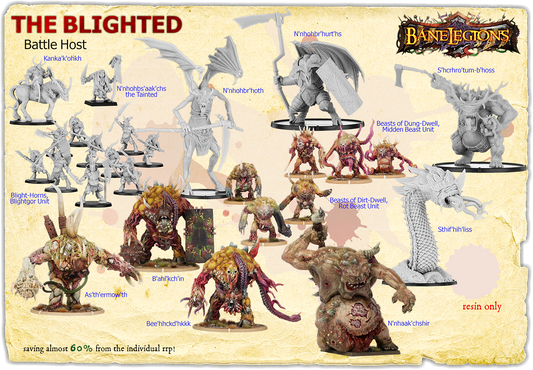
The Blighted Battle Host
BLG-BNL-000-H01 BLG-BNL-000-H01The Blighted Battle Host
BLG-BNL-000-H01 BLG-BNL-000-H01BLG-BNL-000-H01 BaneLegions - BaneBeastsRegular price £349.99Regular priceUnit price / per£349.99Sale price £349.99made to order -
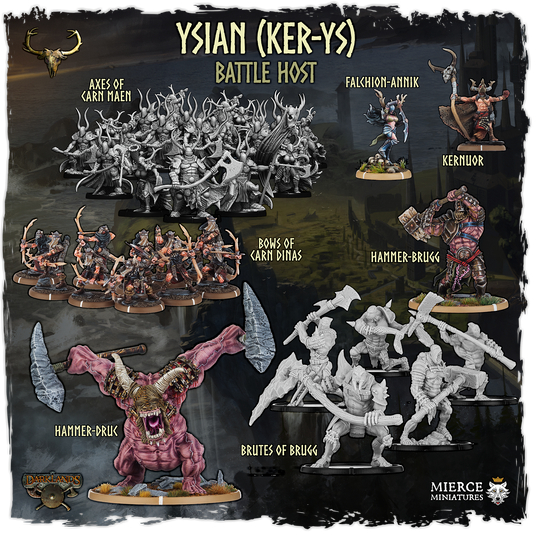
Ysian (Ker-Ys) Ax-Drune Battle Host
YSN-KYS-000-H23 YSN-KYS-000-H23Ysian (Ker-Ys) Ax-Drune Battle Host
YSN-KYS-000-H23 YSN-KYS-000-H23Regular price £199.99Regular priceUnit price / per£199.99Sale price £199.99in stock (3) -
Norse (Skilfing) Holumann Battle Host
NOR-SFG-000-H23 NOR-SFG-000-H23Norse (Skilfing) Holumann Battle Host
NOR-SFG-000-H23 NOR-SFG-000-H23Regular price £199.99Regular priceUnit price / per£199.99Sale price £199.99made to order -
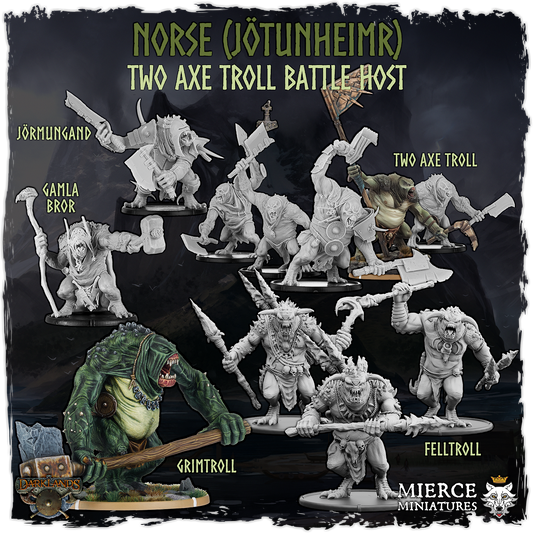
Norse (Jötunheimr) Two Axe Troll Battle Host
NOR-JTN-000-H33 NOR-JTN-000-H33Norse (Jötunheimr) Two Axe Troll Battle Host
NOR-JTN-000-H33 NOR-JTN-000-H33NOR-JTN-000-H33 Norse - JötunheimrRegular price £199.99Regular priceUnit price / per£199.99Sale price £199.99made to order -
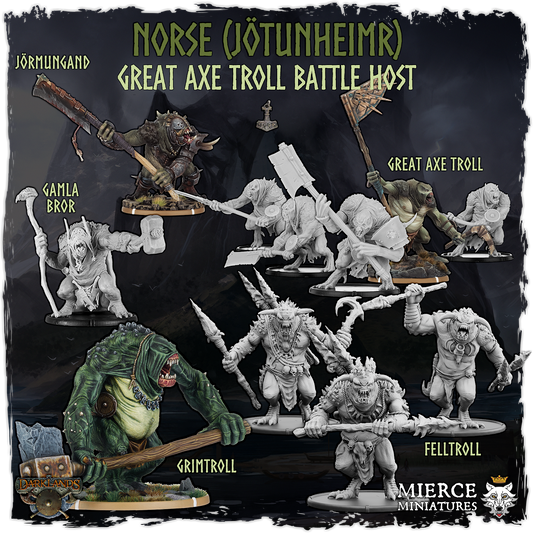
Norse (Jötunheimr) Great Axe Troll Battle Host
NOR-JTN-000-H32 NOR-JTN-000-H32Norse (Jötunheimr) Great Axe Troll Battle Host
NOR-JTN-000-H32 NOR-JTN-000-H32NOR-JTN-000-H32 Norse - JötunheimrRegular price £199.99Regular priceUnit price / per£199.99Sale price £199.99made to order -
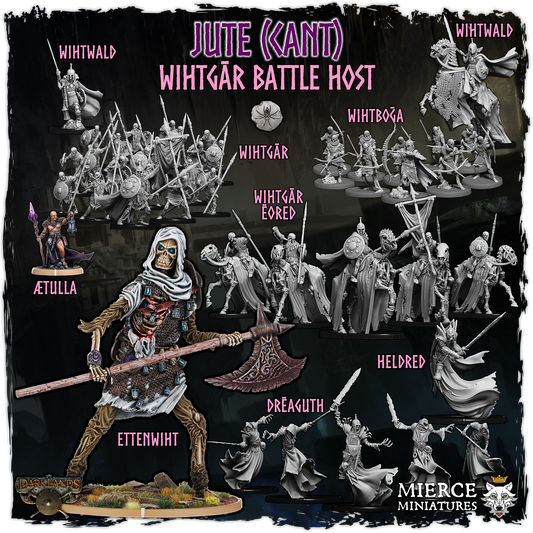
Jute (Wiht) Wihtgār Battle Host
JUT-WHT-000-H22 JUT-WHT-000-H22Sold outJute (Wiht) Wihtgār Battle Host
JUT-WHT-000-H22 JUT-WHT-000-H22Regular price £179.99Regular priceUnit price / per£179.99Sale price £179.99made to orderSold out -
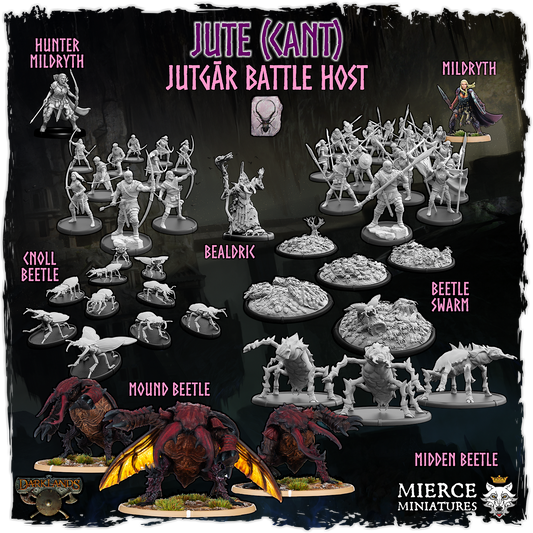
Jute (Cant) Jutgār Battle Host
JUT-CNT-000-H22 JUT-CNT-000-H22Jute (Cant) Jutgār Battle Host
JUT-CNT-000-H22 JUT-CNT-000-H22Regular price £159.99Regular priceUnit price / per£159.99Sale price £159.99made to order -
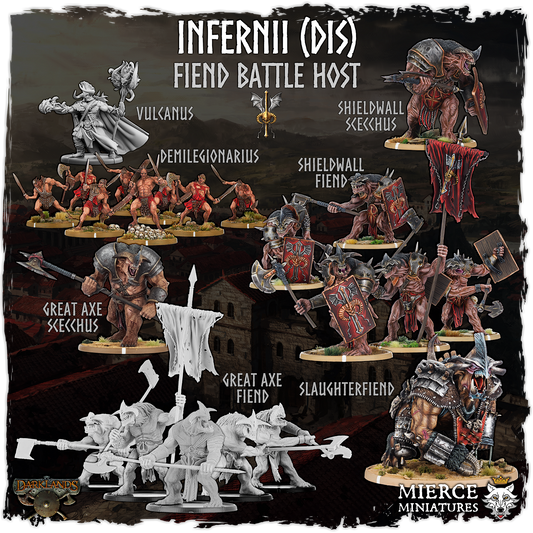
Infernii (Dis) Fiend Battle Host
INF-DIS-000-H31 INF-DIS-000-H31Infernii (Dis) Fiend Battle Host
INF-DIS-000-H31 INF-DIS-000-H31Regular price £249.99Regular priceUnit price / per£249.99Sale price £249.99made to order -
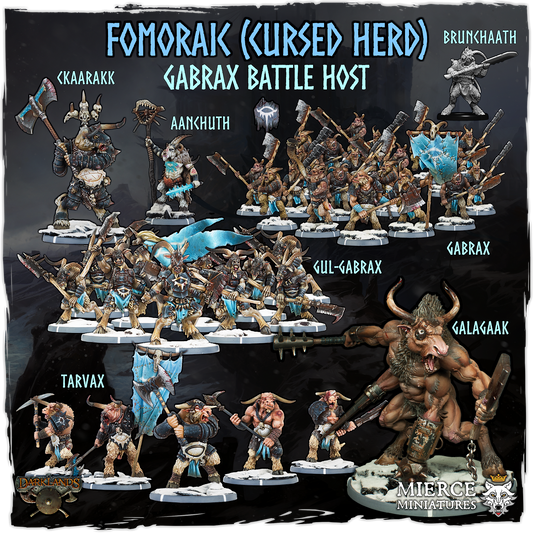
Fomoraic (Cursed Herd) Gabrax Battle Host
FMR-CHD-000-H21 FMR-CHD-000-H21Fomoraic (Cursed Herd) Gabrax Battle Host
FMR-CHD-000-H21 FMR-CHD-000-H21FMR-CHD-000-H21 Fomoraic - Cursed HerdRegular price £249.99Regular priceUnit price / per£249.99Sale price £249.99made to order -
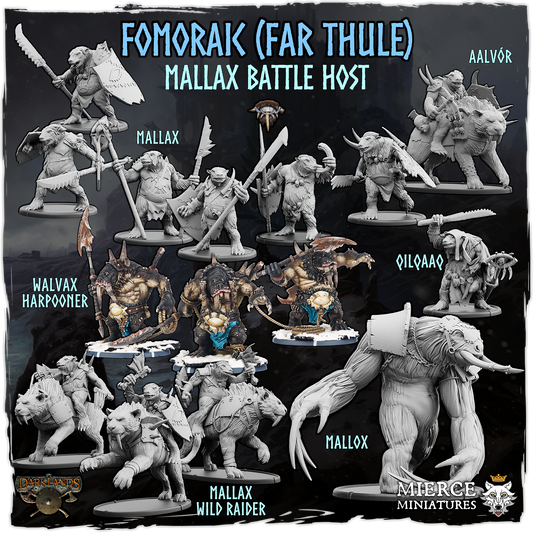
Fomoraic (Far Thule) Mallax Battle Host
FMR-THL-000-H31 FMR-THL-000-H31Fomoraic (Far Thule) Mallax Battle Host
FMR-THL-000-H31 FMR-THL-000-H31Regular price £149.99Regular priceUnit price / per£149.99Sale price £149.99made to order -
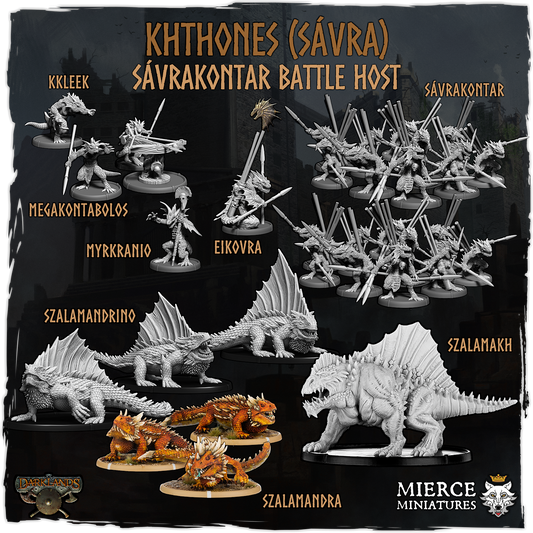
Khthones (Sávra) Sávrakontar Battle Host
KTH-SAV-000-H23 KTH-SAV-000-H23Khthones (Sávra) Sávrakontar Battle Host
KTH-SAV-000-H23 KTH-SAV-000-H23Regular price £129.99Regular priceUnit price / per£129.99Sale price £129.99made to order -
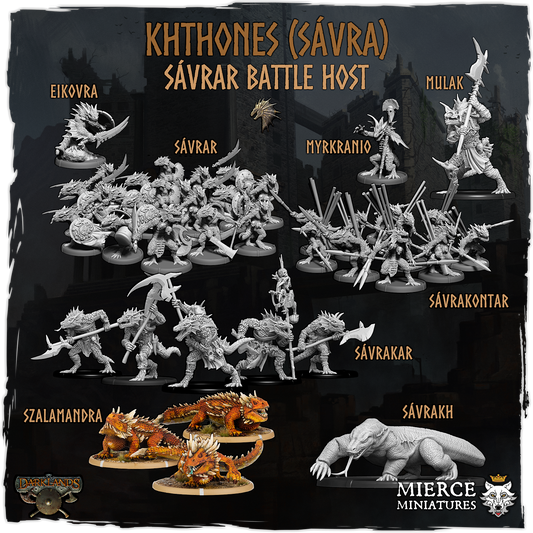
Khthones (Sávra) Sávrar Battle Host
KTH-SAV-000-H22 KTH-SAV-000-H22Khthones (Sávra) Sávrar Battle Host
KTH-SAV-000-H22 KTH-SAV-000-H22Regular price £179.99Regular priceUnit price / per£179.99Sale price £179.99made to order -
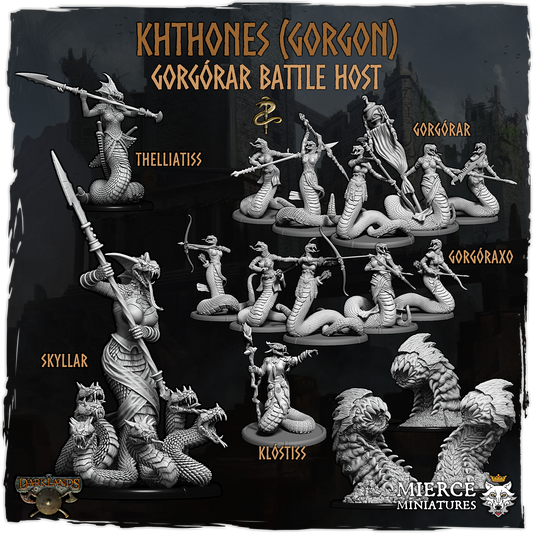
Khthones (Gorgon) Gorgórar Battle Host
KTH-GOR-000-H33 KTH-GOR-000-H33Khthones (Gorgon) Gorgórar Battle Host
KTH-GOR-000-H33 KTH-GOR-000-H33Regular price £129.99Regular priceUnit price / per£129.99Sale price £129.99made to order -
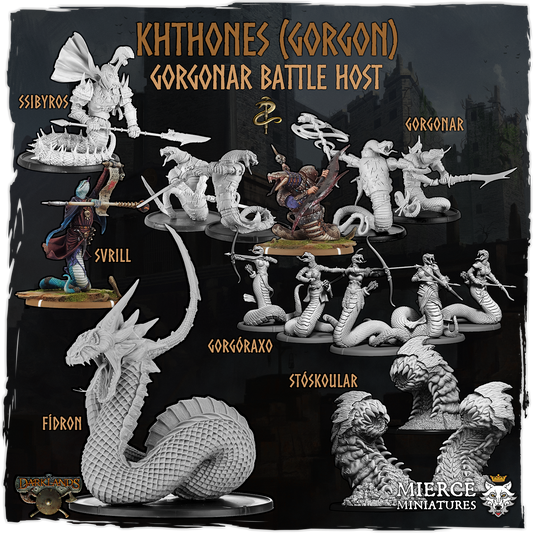
Khthones (Gorgon) Gorgonar Battle Host
KTH-GOR-000-H32 KTH-GOR-000-H32Khthones (Gorgon) Gorgonar Battle Host
KTH-GOR-000-H32 KTH-GOR-000-H32Regular price £179.99Regular priceUnit price / per£179.99Sale price £179.99made to order -
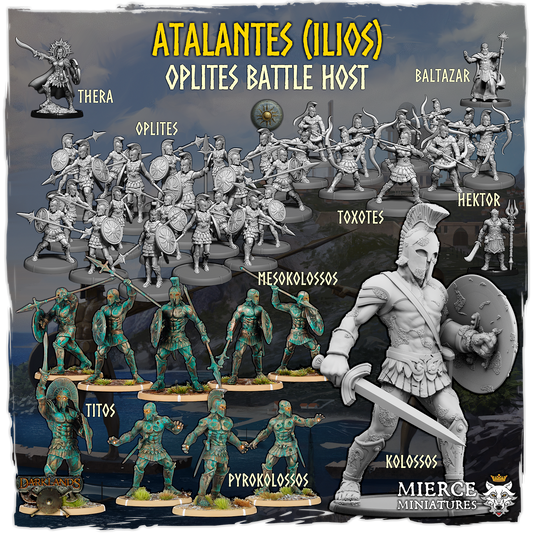
Atalantes (Ilios) Oplites Battle Host
ATL-ILS-000-H23 ATL-ILS-000-H23Atalantes (Ilios) Oplites Battle Host
ATL-ILS-000-H23 ATL-ILS-000-H23Regular price £149.99Regular priceUnit price / per£149.99Sale price £149.99made to order -
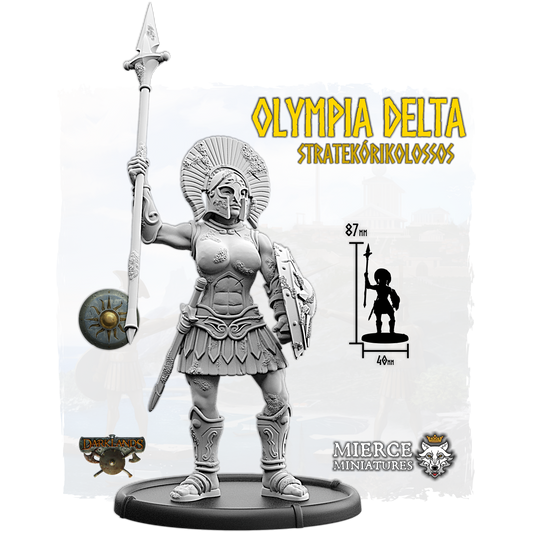
Olympia Delta, Stratekórikolossos
ATL-ILS-1414 ATL-ILS-1414Olympia Delta, Stratekórikolossos
ATL-ILS-1414 ATL-ILS-1414Regular price £12.49Regular priceUnit price / per£9.99Sale price £12.49in stock -
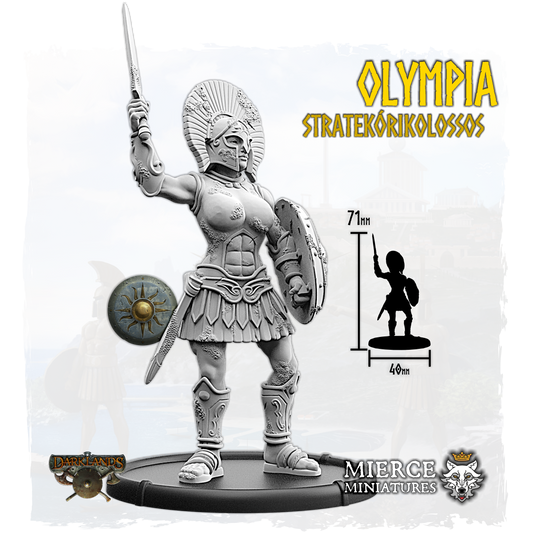
Olympia, Stratekórikolossos
ATL-ILS-1410 ATL-ILS-1410Olympia, Stratekórikolossos
ATL-ILS-1410 ATL-ILS-1410Regular price £12.49Regular priceUnit price / per£9.99Sale price £12.49in stock -
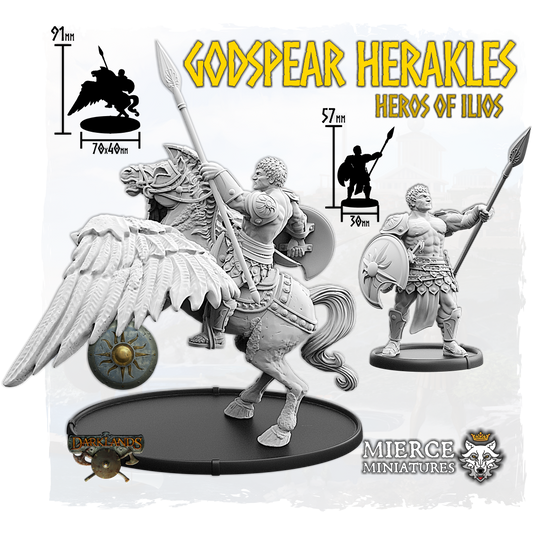
Godspear Herakles, Heros of Ilios
ATL-ILS-0223 ATL-ILS-0223Godspear Herakles, Heros of Ilios
ATL-ILS-0223 ATL-ILS-0223Regular price from £7.99Regular priceUnit price / per£6.99Sale price from £7.99made to order -

Herakles, Heros of Ilios
ATL-ILS-0220 ATL-ILS-0220Herakles, Heros of Ilios
ATL-ILS-0220 ATL-ILS-0220Regular price from £7.99Regular priceUnit price / per£6.99Sale price from £7.99made to order -

Sunspear Kyros, Strategos of Ilios
ATL-ILS-0203 ATL-ILS-0203Sunspear Kyros, Strategos of Ilios
ATL-ILS-0203 ATL-ILS-0203Regular price from £7.99Regular priceUnit price / per£6.99Sale price from £7.99made to order -
Kyros, Strategos of Ilios
ATL-ILS-0200 ATL-ILS-0200Kyros, Strategos of Ilios
ATL-ILS-0200 ATL-ILS-0200Regular price from £7.99Regular priceUnit price / per£6.99Sale price from £7.99made to order -

Ravaging Mallax, Mallax Wild Axer Unit
FMR-THL-5720-003 FMR-THL-5720-003Ravaging Mallax, Mallax Wild Axer Unit
FMR-THL-5720-003 FMR-THL-5720-003FMR-THL-5720-003Regular price from £29.99Regular priceUnit price / per£29.99Sale price from £29.99 -


Grotling Battle Wagon VI
AVW-GOB-9105 AVW-GOB-9105Grotling Battle Wagon VI
AVW-GOB-9105 AVW-GOB-9105Avatars of War Avatars of WarRegular price £29.99Regular priceUnit price / per£29.99Sale price £29.99made to order -


Grotling Battle Wagon V
AVW-GOB-9104 AVW-GOB-9104Grotling Battle Wagon V
AVW-GOB-9104 AVW-GOB-9104Avatars of War Avatars of WarRegular price £19.99Regular priceUnit price / per£19.99Sale price £19.99made to order -


Grotling Battle Wagon IV
AVW-GOB-9103 AVW-GOB-9103Grotling Battle Wagon IV
AVW-GOB-9103 AVW-GOB-9103Avatars of War Avatars of WarRegular price £29.99Regular priceUnit price / per£29.99Sale price £29.99made to order -


Grotling Battle Wagon III
AVW-GOB-9102 AVW-GOB-9102Grotling Battle Wagon III
AVW-GOB-9102 AVW-GOB-9102Avatars of War Avatars of WarRegular price £29.99Regular priceUnit price / per£29.99Sale price £29.99made to order -


Grotling Battle Wagon II
AVW-GOB-9101 AVW-GOB-9101Grotling Battle Wagon II
AVW-GOB-9101 AVW-GOB-9101Avatars of War Avatars of WarRegular price £19.99Regular priceUnit price / per£19.99Sale price £19.99made to order -


Grotling Battle Wagon I
AVW-GOB-9100 AVW-GOB-9100Grotling Battle Wagon I
AVW-GOB-9100 AVW-GOB-9100Avatars of War Avatars of WarRegular price £29.99Regular priceUnit price / per£29.99Sale price £29.99made to order -

Manticore
AVW-DEF-0800 AVW-DEF-0800Manticore
AVW-DEF-0800 AVW-DEF-0800Avatars of War Avatars of WarRegular price £39.99Regular priceUnit price / per£39.99Sale price £39.99made to order -
Minotaurs with Weapon and Shield Regiment II
AVW-BMN-3201 AVW-BMN-3201Minotaurs with Weapon and Shield Regiment II
AVW-BMN-3201 AVW-BMN-3201Avatars of War Avatars of WarRegular price £49.99Regular priceUnit price / per£49.99Sale price £49.99made to order -
Minotaurs with Weapon and Shield Regiment I
AVW-BMN-3200 AVW-BMN-3200Minotaurs with Weapon and Shield Regiment I
AVW-BMN-3200 AVW-BMN-3200Avatars of War Avatars of WarRegular price £59.99Regular priceUnit price / per£59.99Sale price £59.99made to order -
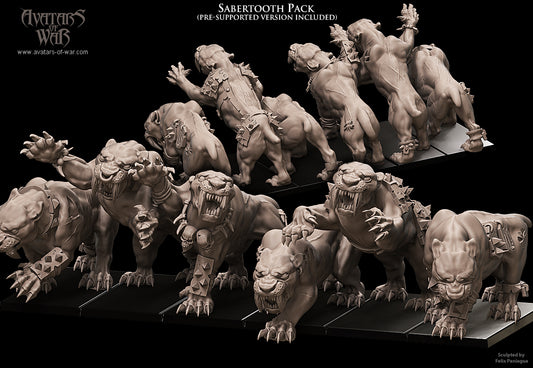

Sabretooth Tigers
AVW-BBN-7100 AVW-BBN-7100Sabretooth Tigers
AVW-BBN-7100 AVW-BBN-7100Avatars of War Avatars of WarRegular price £39.99Regular priceUnit price / per£39.99Sale price £39.99made to order -


Goblin Archers Multi-Part Regiment
AVW-GOB-2200 AVW-GOB-2200Goblin Archers Multi-Part Regiment
AVW-GOB-2200 AVW-GOB-2200Avatars of War Avatars of WarRegular price £29.99Regular priceUnit price / per£29.99Sale price £29.99made to order -
Razortusks Multi-Part Regiment
AVW-ORC-7100 AVW-ORC-7100Razortusks Multi-Part Regiment
AVW-ORC-7100 AVW-ORC-7100Avatars of War Avatars of WarRegular price £49.99Regular priceUnit price / per£49.99Sale price £49.99made to order -
Barbarian Lord on Sabretooth
AVW-BBN-0100 AVW-BBN-0100Barbarian Lord on Sabretooth
AVW-BBN-0100 AVW-BBN-0100Avatars of War Avatars of WarRegular price £17.49Regular priceUnit price / per£17.49Sale price £17.49made to order -
Dwarf Runesmith Statue
AVW-DWF-9520 AVW-DWF-9520Dwarf Runesmith Statue
AVW-DWF-9520 AVW-DWF-9520Avatars of War Avatars of WarRegular price £24.99Regular priceUnit price / per£24.99Sale price £24.99made to order -
Dwarf Berserker Statue
AVW-DWF-9510 AVW-DWF-9510Dwarf Berserker Statue
AVW-DWF-9510 AVW-DWF-9510Avatars of War Avatars of WarRegular price £24.99Regular priceUnit price / per£24.99Sale price £24.99made to order -
Dwarf King Statue
AVW-DWF-9500 AVW-DWF-9500Dwarf King Statue
AVW-DWF-9500 AVW-DWF-9500Avatars of War Avatars of WarRegular price £24.99Regular priceUnit price / per£24.99Sale price £24.99made to order -
Dwarf Female Berserker II
AVW-DWF-1210 AVW-DWF-1210Dwarf Female Berserker II
AVW-DWF-1210 AVW-DWF-1210Avatars of War Avatars of WarRegular price £7.99Regular priceUnit price / per£7.99Sale price £7.99made to order -
Dwarf Female Berserker I
AVW-DWF-1200 AVW-DWF-1200Dwarf Female Berserker I
AVW-DWF-1200 AVW-DWF-1200Avatars of War Avatars of WarRegular price £7.99Regular priceUnit price / per£7.99Sale price £7.99made to order -
Dwarf Berserker Engineer
AVW-DWF-1110 AVW-DWF-1110Dwarf Berserker Engineer
AVW-DWF-1110 AVW-DWF-1110Avatars of War Avatars of WarRegular price £7.99Regular priceUnit price / per£7.99Sale price £7.99made to order -
Dwarf Engineer
AVW-DWF-1100 AVW-DWF-1100Dwarf Engineer
AVW-DWF-1100 AVW-DWF-1100Avatars of War Avatars of WarRegular price £7.99Regular priceUnit price / per£7.99Sale price £7.99made to order -
Dwarf Berserker Lord
AVW-DWF-0100 AVW-DWF-0100Dwarf Berserker Lord
AVW-DWF-0100 AVW-DWF-0100Avatars of War Avatars of WarRegular price £7.99Regular priceUnit price / per£7.99Sale price £7.99made to order -
Dark Elf Dread Maidens Regiment
AVW-DEF-2310 AVW-DEF-2310Dark Elf Dread Maidens Regiment
AVW-DEF-2310 AVW-DEF-2310Avatars of War Avatars of WarRegular price £69.99Regular priceUnit price / per£69.99Sale price £69.99made to order -
Dark Elf Witches Regiment
AVW-DEF-2300 AVW-DEF-2300Dark Elf Witches Regiment
AVW-DEF-2300 AVW-DEF-2300Avatars of War Avatars of WarRegular price £49.99Regular priceUnit price / per£49.99Sale price £49.99made to order


![Youths of Stæford, Ḡeoguth Unit [digital]](http://mierce-miniatures.com/cdn/shop/files/ANG-MRC-2150-007-YouthsofStaeford-M-M-P-01.jpg?v=1780504611&width=533)

![Youths of Stæford, Ḡeoguth Unit [digital]](http://mierce-miniatures.com/cdn/shop/files/ANG-DRA-2150-007-YouthsofStaeford-M-M-P-01.jpg?v=1780504558&width=533)
![Youths of Stæford, Ḡeoguth Unit [digital]](http://mierce-miniatures.com/cdn/shop/files/ANG-BRN-2150-007-YouthsofStaeford-M-M-P-01.jpg?v=1780504551&width=533)

![Snorters of Ḡerne, Frēofor Unit [digital]](http://mierce-miniatures.com/cdn/shop/files/mierce-anglecynn-eofora-snorters-of-gerne-freofor-unit_01_large_9da4122c-89cf-4707-a2a9-38302d407b98.png?v=1780491737&width=533)
![Grunters of Rendlæs, Wereofor Unit [digital]](http://mierce-miniatures.com/cdn/shop/files/mierce-anglecynn-eofora-grunters-of-rendlaes-wereofor-unit-7x-warriors-w-cmd_01_large_ba229077-5f95-4a95-84a8-d39d837403b1.png?v=1780491732&width=533)
![Youths of Stæford, Ḡeoguth Unit [digital]](http://mierce-miniatures.com/cdn/shop/files/ANG-EFR-2150-007-YouthsofStaeford-M-M-P-01.jpg?v=1780504541&width=533)
![Broḡa, Wereofor Theḡn [digital]](http://mierce-miniatures.com/cdn/shop/files/mierce-anglecynn-eofora-broga-wereofor-thegn_01_large_c5b0dc40-9362-4f0b-b0b1-c9904272fccb.png?v=1780491718&width=533)


![The Bronzefists Battle Host [digital]](http://mierce-miniatures.com/cdn/shop/files/mierce-atalantes-ilios-the-bronzefists-battle-host-digital_01_large_9e71330e-90b7-4a3b-80ab-7b7b134c6437.png?v=1775731777&width=533)


![Iskarnos, Szalamakh [digital]](http://mierce-miniatures.com/cdn/shop/files/mierce-khthones-savra-iskarnos-szalamakh_01_large_e500e57b-5248-4ec2-8502-8eef2ce5e22a.png?v=1765973129&width=533)


![Uuluu, Titanic Backwhale [digital]](http://mierce-miniatures.com/cdn/shop/files/mierce-fomoraic-conand-uuluu-titanic-backwhale_01_large_b6ac9dc8-525b-469f-b6f2-6eccefbcd893.png?v=1762773291&width=533)


![Sunspear Thera [Pin Up], Lokhagos of Ilios on Foot](http://mierce-miniatures.com/cdn/shop/files/mierce-atalantes-ilios-sunspear-thera-pin-up-lokhagos-of-ilios-on-foot_01_large_a7cc6cdd-31eb-4667-9ffc-475f41ca4b18.png?v=1762439837&width=533)


![Norse (Skilfing) Holumann Battle Host [digital]](http://mierce-miniatures.com/cdn/shop/files/00-norse-skilfing-battle-host-01_ffbb4c09-271e-40c4-82cf-b83d2e791467.jpg?v=1770896897&width=533)

![Godspear Herakles, Heros of Ilios [digital]](http://mierce-miniatures.com/cdn/shop/files/mierce-atalantes-ilios-godspear-herakles-heros-of-ilios_01_large_1901904e-5f09-4643-9bbb-008cf4af08a9.png?v=1761127464&width=533)

![Herakles, Heros of Ilios [digital]](http://mierce-miniatures.com/cdn/shop/files/mierce-atalantes-ilios-herakles-heros-of-ilios_01_large_5e8179c8-7f55-42bb-8d19-d2d655358e4b.png?v=1761127460&width=533)

![Sunspear Kyros, Strategos of Ilios [digital]](http://mierce-miniatures.com/cdn/shop/files/mierce-atalantes-ilios-sunspear-kyros-strategos-of-ilios_01_large_3bd55860-5d1a-42da-ad49-c6b92187a0b0.png?v=1761127457&width=533)

![Kyros, Strategos of Ilios [digital]](http://mierce-miniatures.com/cdn/shop/files/mierce-atalantes-ilios-kyros-strategos-of-ilios_01_large_b3d38f44-c124-4259-ac35-e94ce5984354.png?v=1761127454&width=533)


Penda's Blog
View all-

Of Ogres, Giants, Half-Demons and Hobbies
Rob LaneWe have a bumper blog post for you all today, fellow Miercenaries; not only do I speak of new hobby stuff you can grab from us, there's some amazing images...
4 commentsOf Ogres, Giants, Half-Demons and Hobbies
Rob LaneWe have a bumper blog post for you all today, fellow Miercenaries; not only do I speak of new hobby stuff you can grab from us, there's some amazing images...
4 comments -

Goodies, Baddies and Uglies
Rob LaneIt's far too hot for my northern comfort, but despite the heat I've lots of lovely work in progress images to show you today, along with an update on how...
4 commentsGoodies, Baddies and Uglies
Rob LaneIt's far too hot for my northern comfort, but despite the heat I've lots of lovely work in progress images to show you today, along with an update on how...
4 comments -

The Weeks Ahead
Rob LaneIt's about time I posted an update again, so here I am talking about next week, the week after that, and probably the week after that too. And then further...
3 commentsThe Weeks Ahead
Rob LaneIt's about time I posted an update again, so here I am talking about next week, the week after that, and probably the week after that too. And then further...
3 comments


Darklands, the game
Learn all about Darklands, a tabletop wargame set in the Dark Ages of our world, where fantasy meets history...
Subscribe to our emails
Be the first to know about new collections and exclusive offers.